Hot stuff!
We took out our old wood burning stove at the end of September in anticipation of redoing the whole area. We have known since we moved in that we wanted to replace it with a pellet stove, but the little spot where the stove is is kind of strange and slightly un-centered and visually problematic.
We went round and round for two years with different ideas - do we remove the vertical pipe completely and re-direct it out the wall and through the porch? That leaves a potential roof and ceiling problem, not to mention a possible porch problem. Then there is the back wall tiling - If we center the tiling between the window and sliding glass door, the vertical pipe will be un-centered; if we leave the tile in the same configuration, it is centered on the pipe, but looks awkward. And don’t get us started on what size/shape/style/color of stove to get. We have been paralyzed with different ideas, but no clear way forward.
This fall we FINALLY decided to bite the bullet. After all, we were almost to the end of the cord of wood that Colton split for us back in 2014! Here is what we started with:

Okay - position in general is great, given our open floor plan. A stove keeps the entire house super warm. But, there are multiple problems - 1) We think this stove is kind of ugly. 2) The ceramic tile that is behind the stove is SUPER ugly. 3) The ceramic tile on the wall is oddly-placed - while it is centered on the stove, visually, it’s just weird the way it has that gap to the right. We tried to distract that by hanging the windmill clock up, but still yuck. 4) The same ugly ceramic tile is on the floor, and again, it being centered on the stove leaves it visually awkward side to side. But mostly, it is just so ugly.

You can see some of the brick samples we were considering.
First step was having the stove installer remove the old unit (the state needs proof of destruction, and then they give us a $1,400 credit for replacing it, nice.) Then the tiling buys removed the ugly ceramic tile.
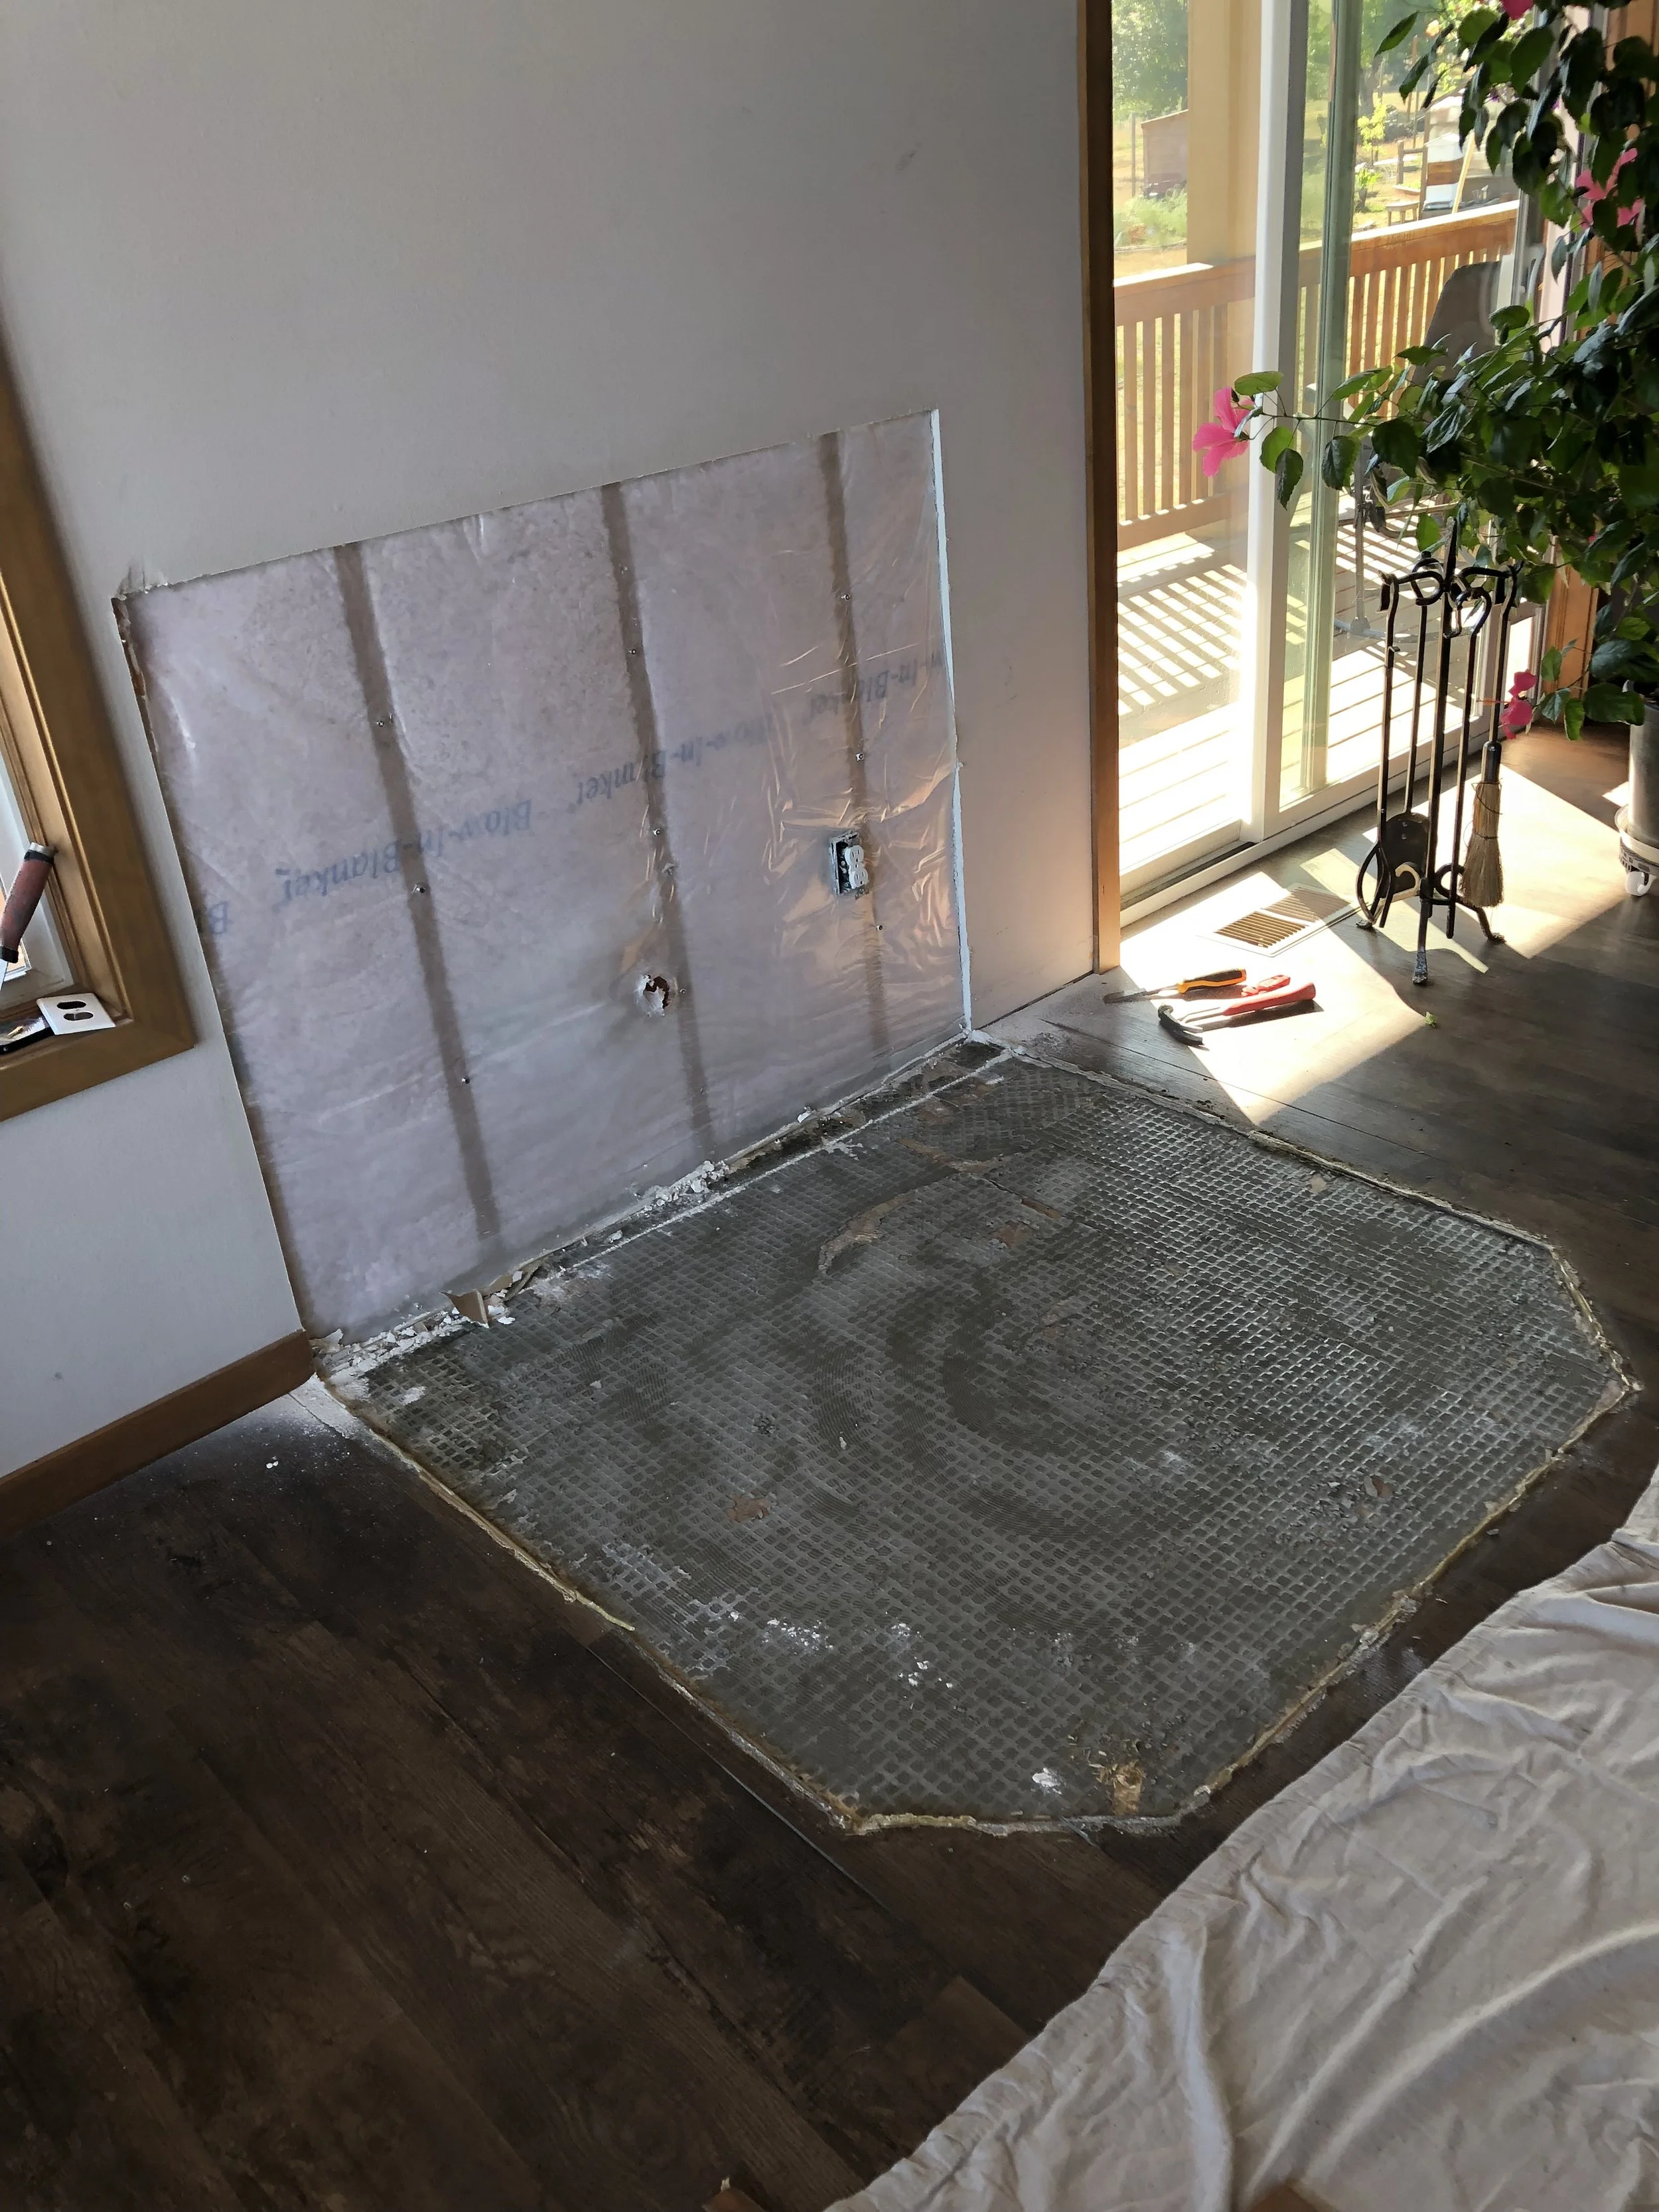
The danger in doing anything that touches the floor is that our ENTIRE HOUSE has this same flooring. It is old and we have no extra. So we never want to do anything that opens up that can of worms!
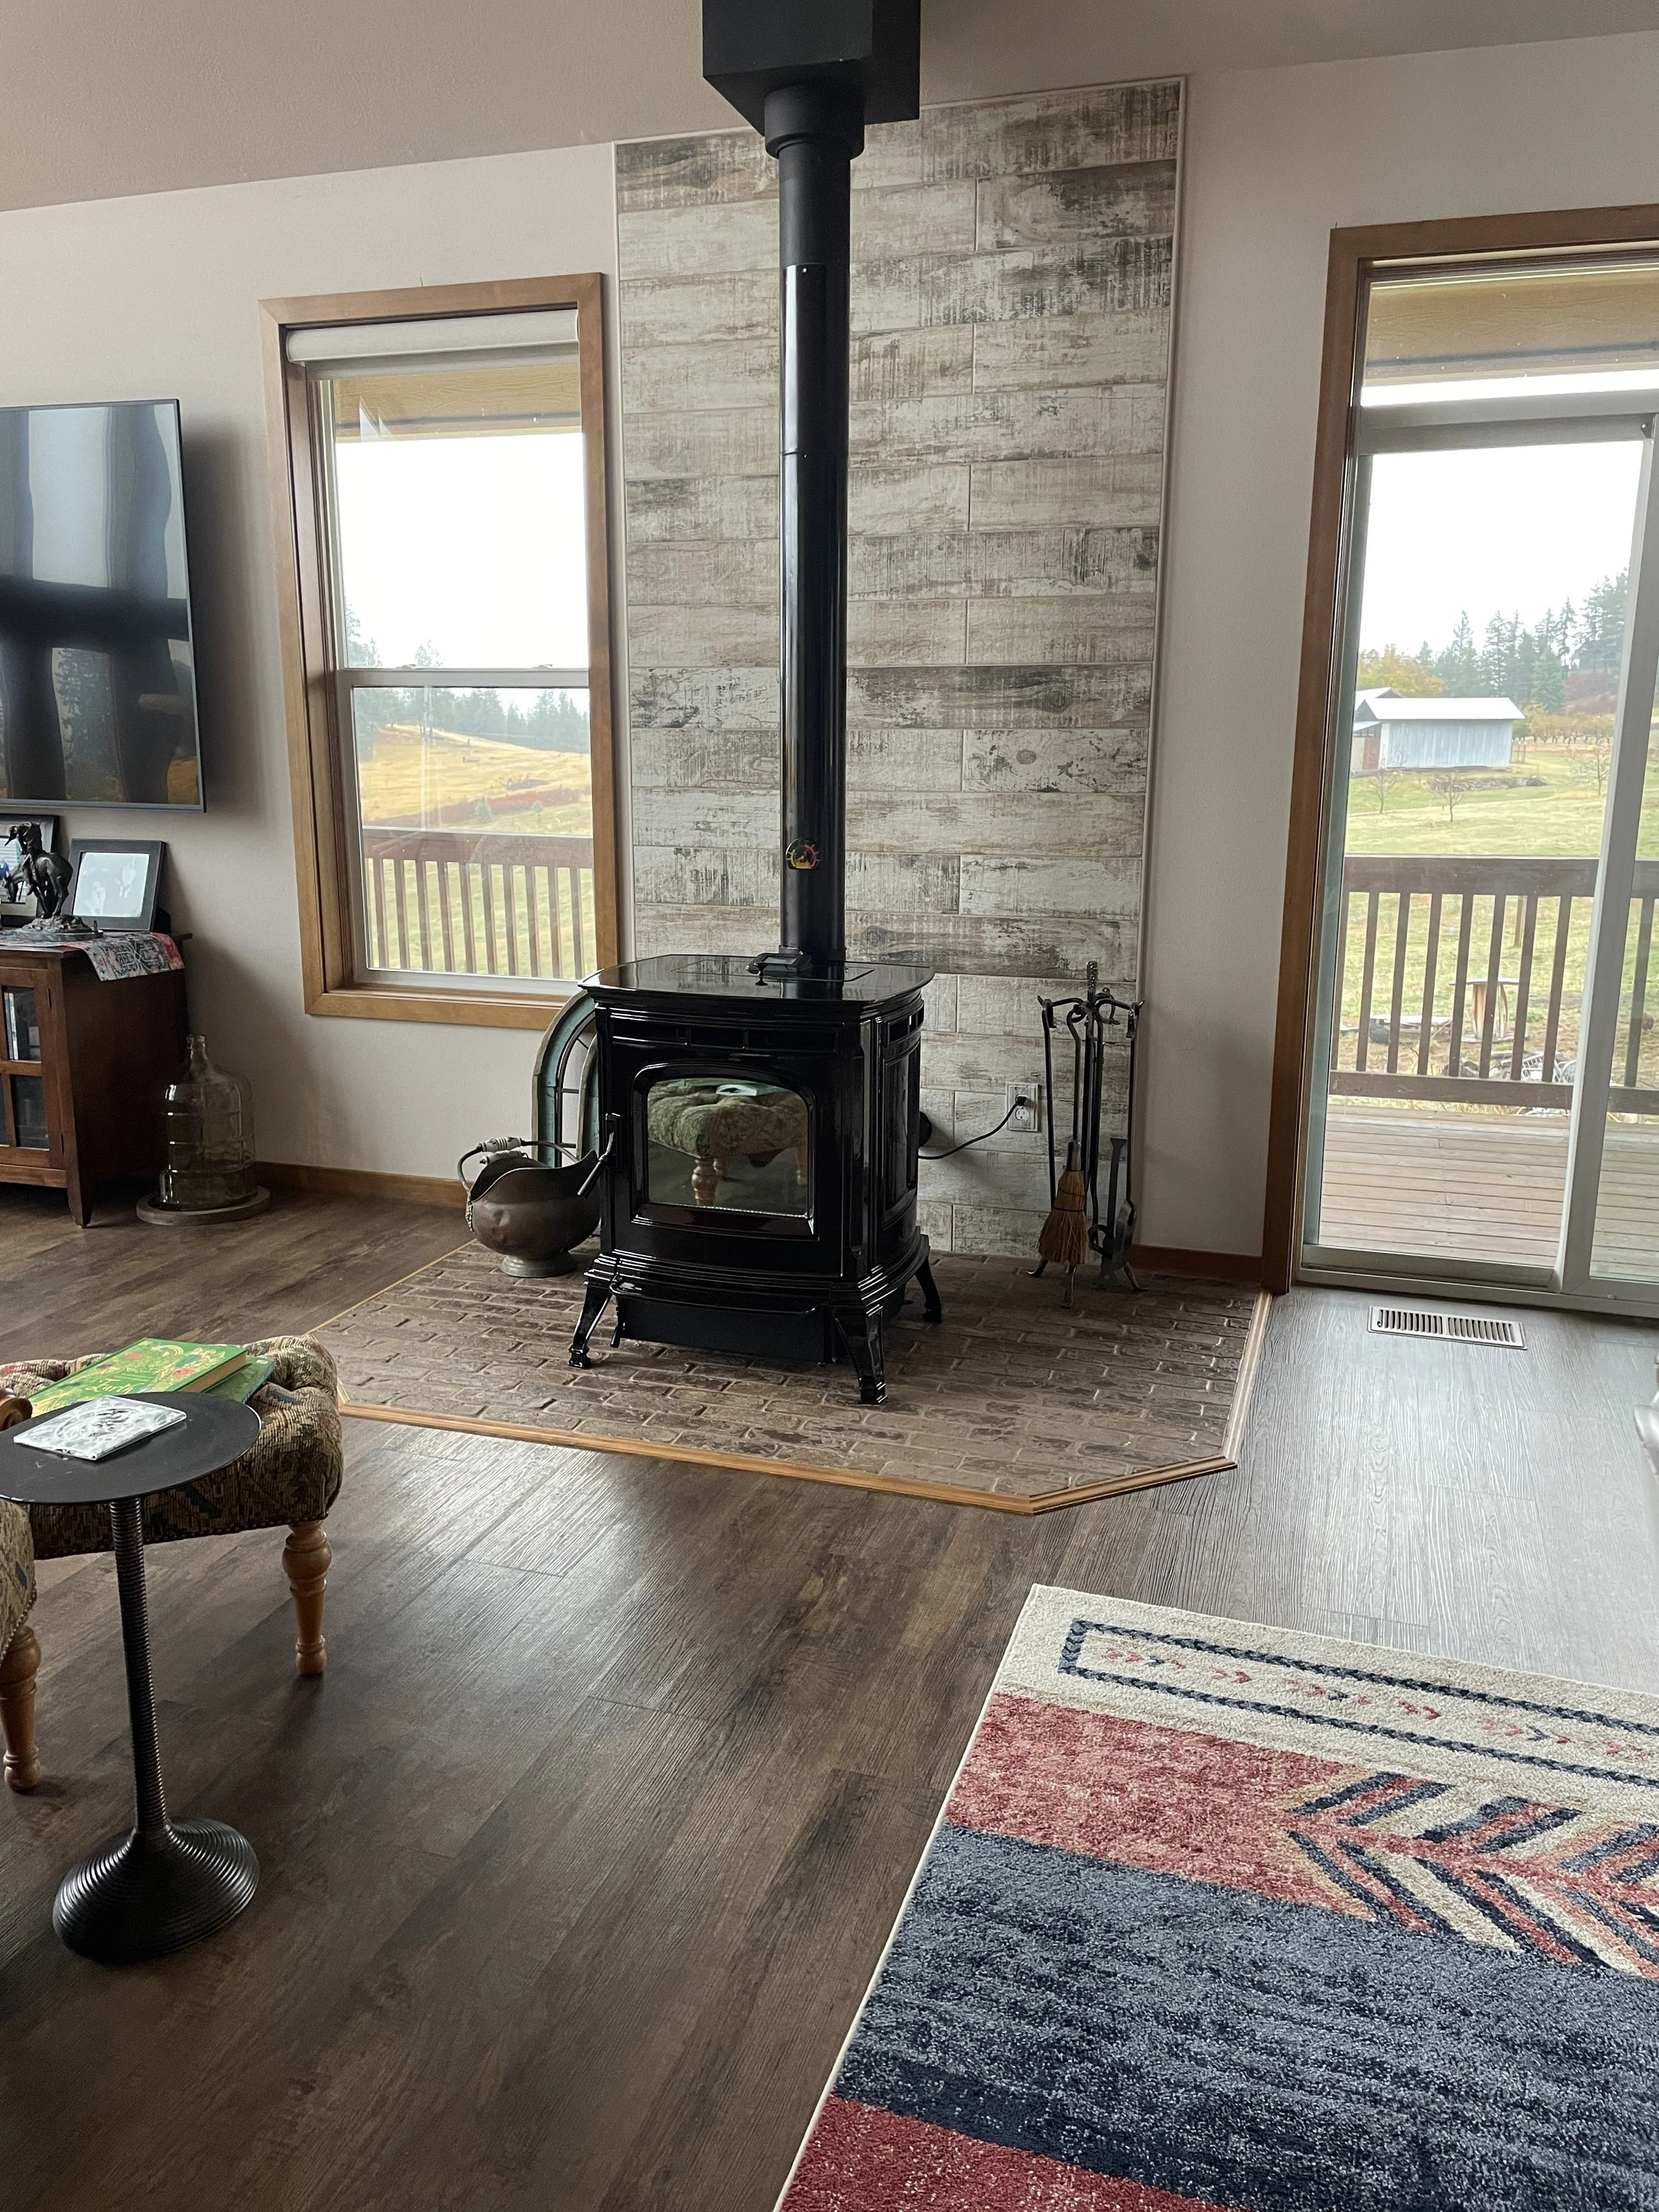
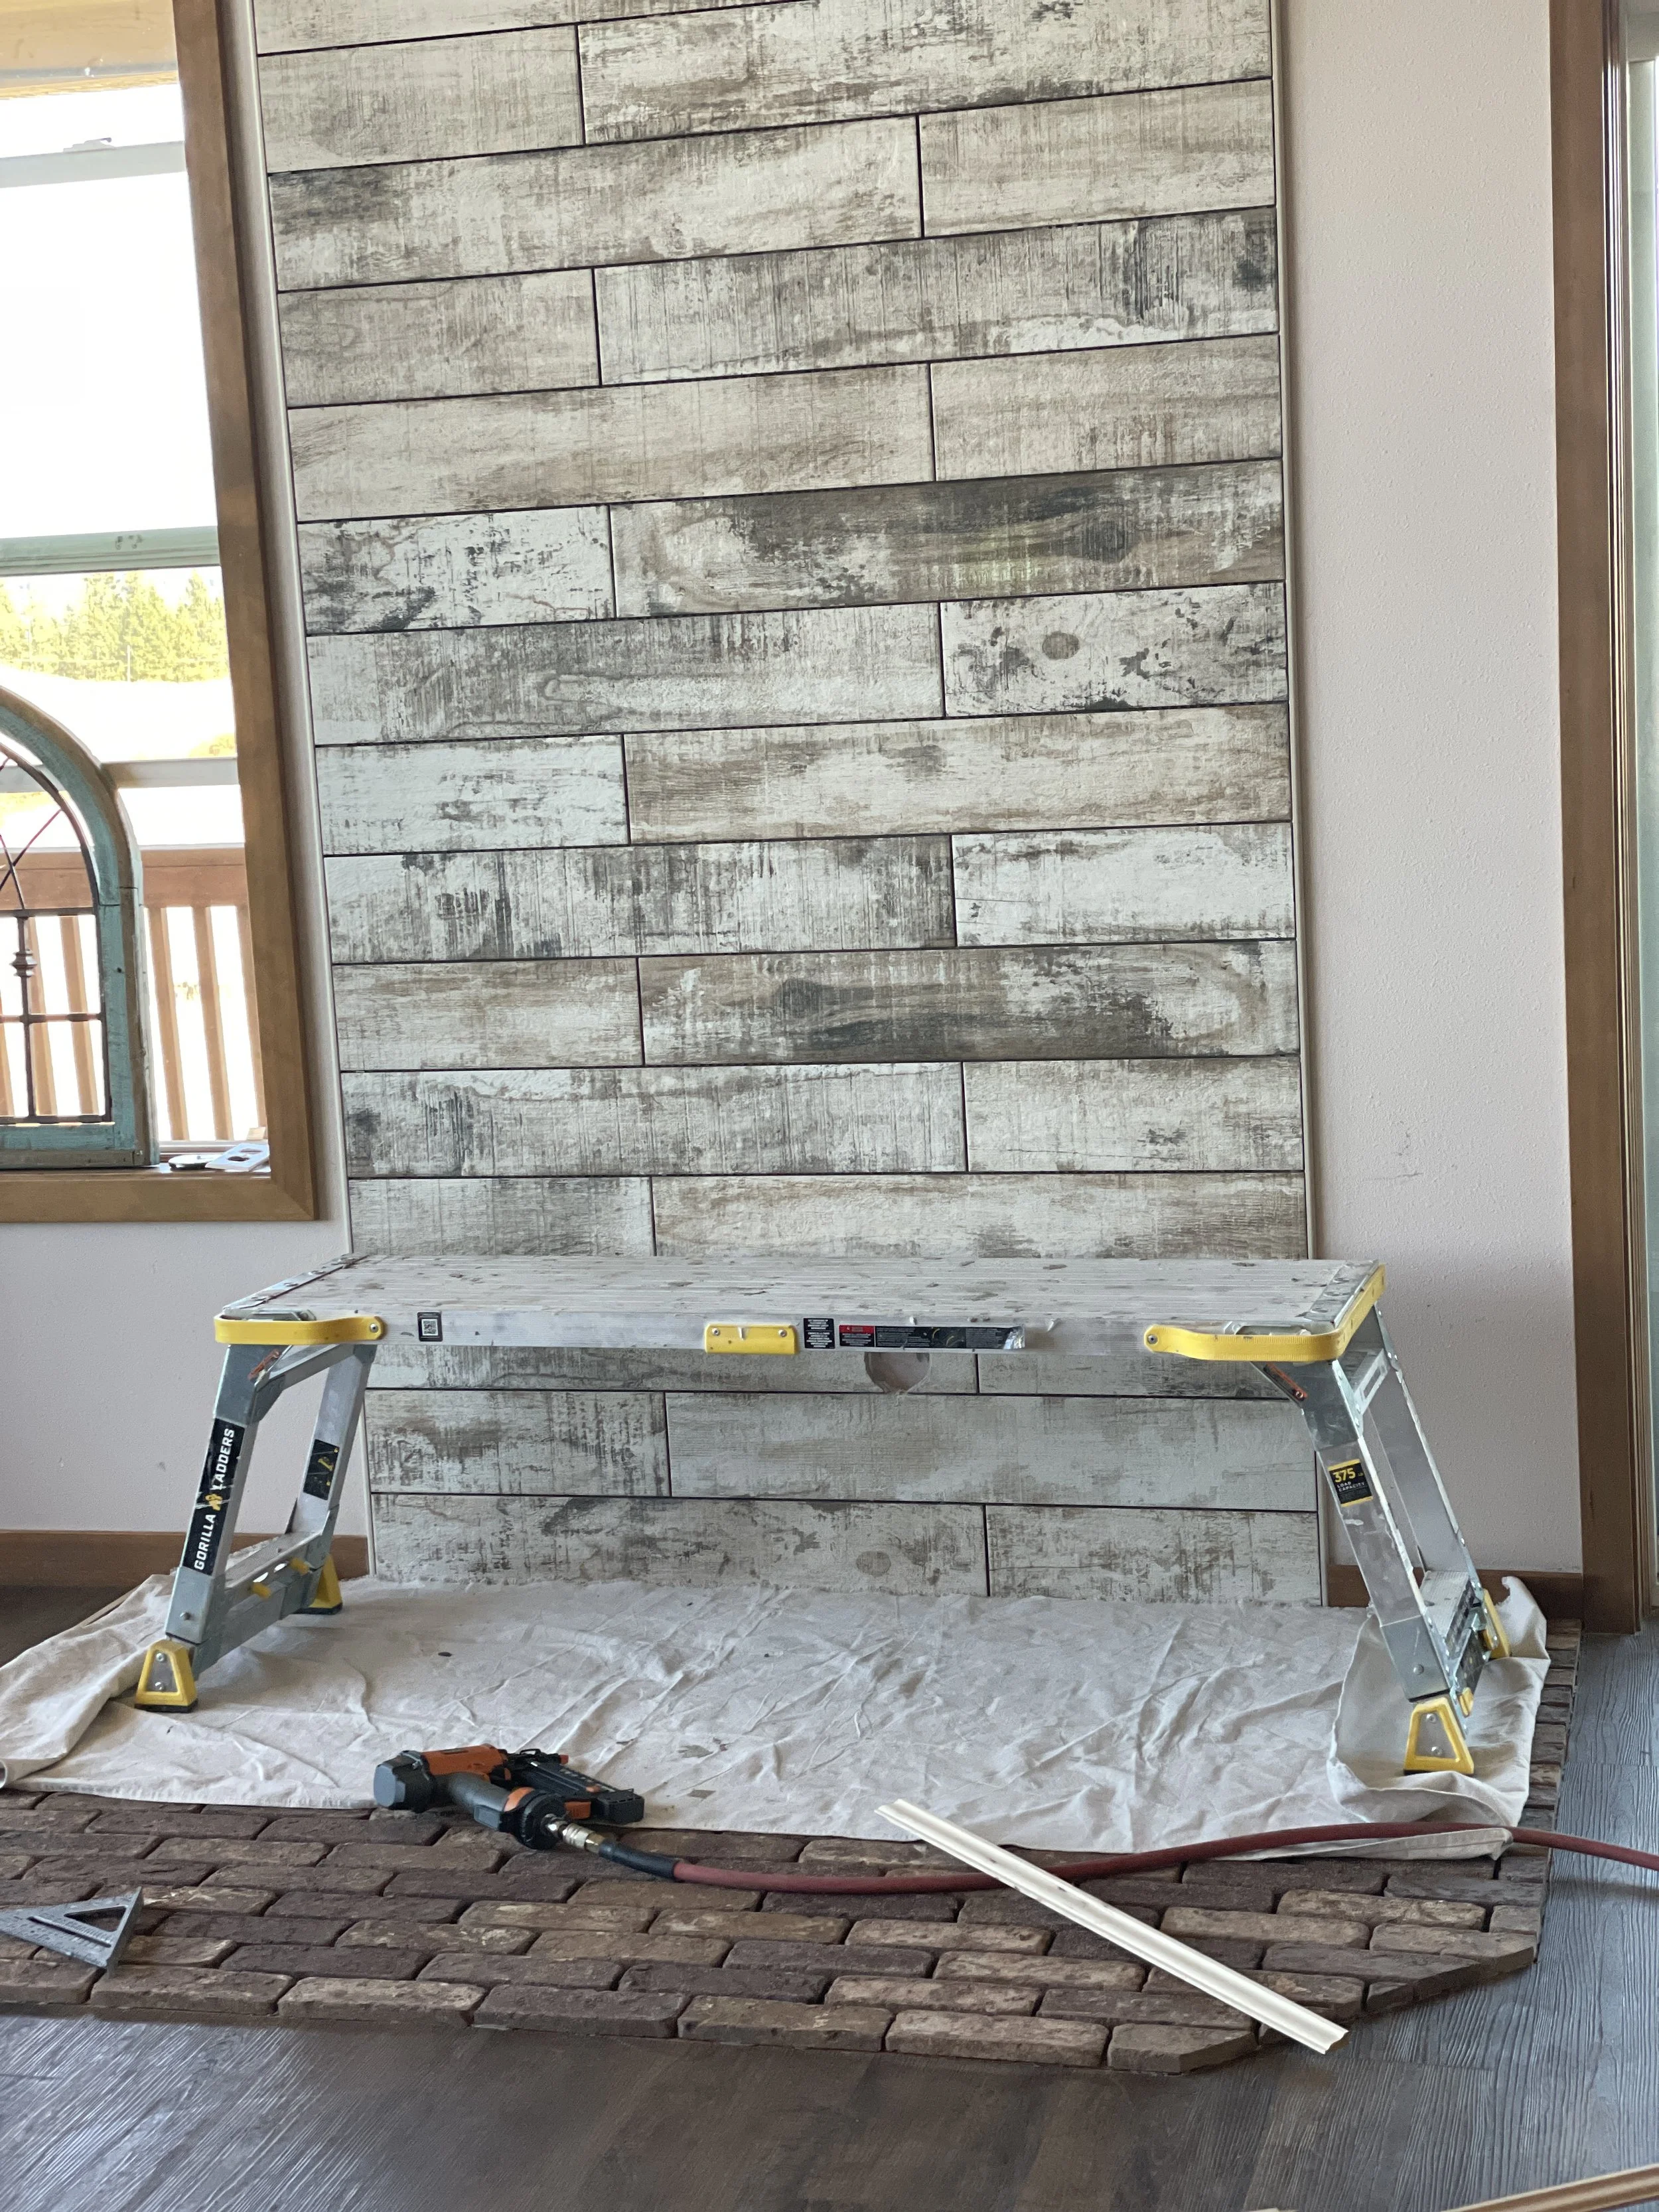
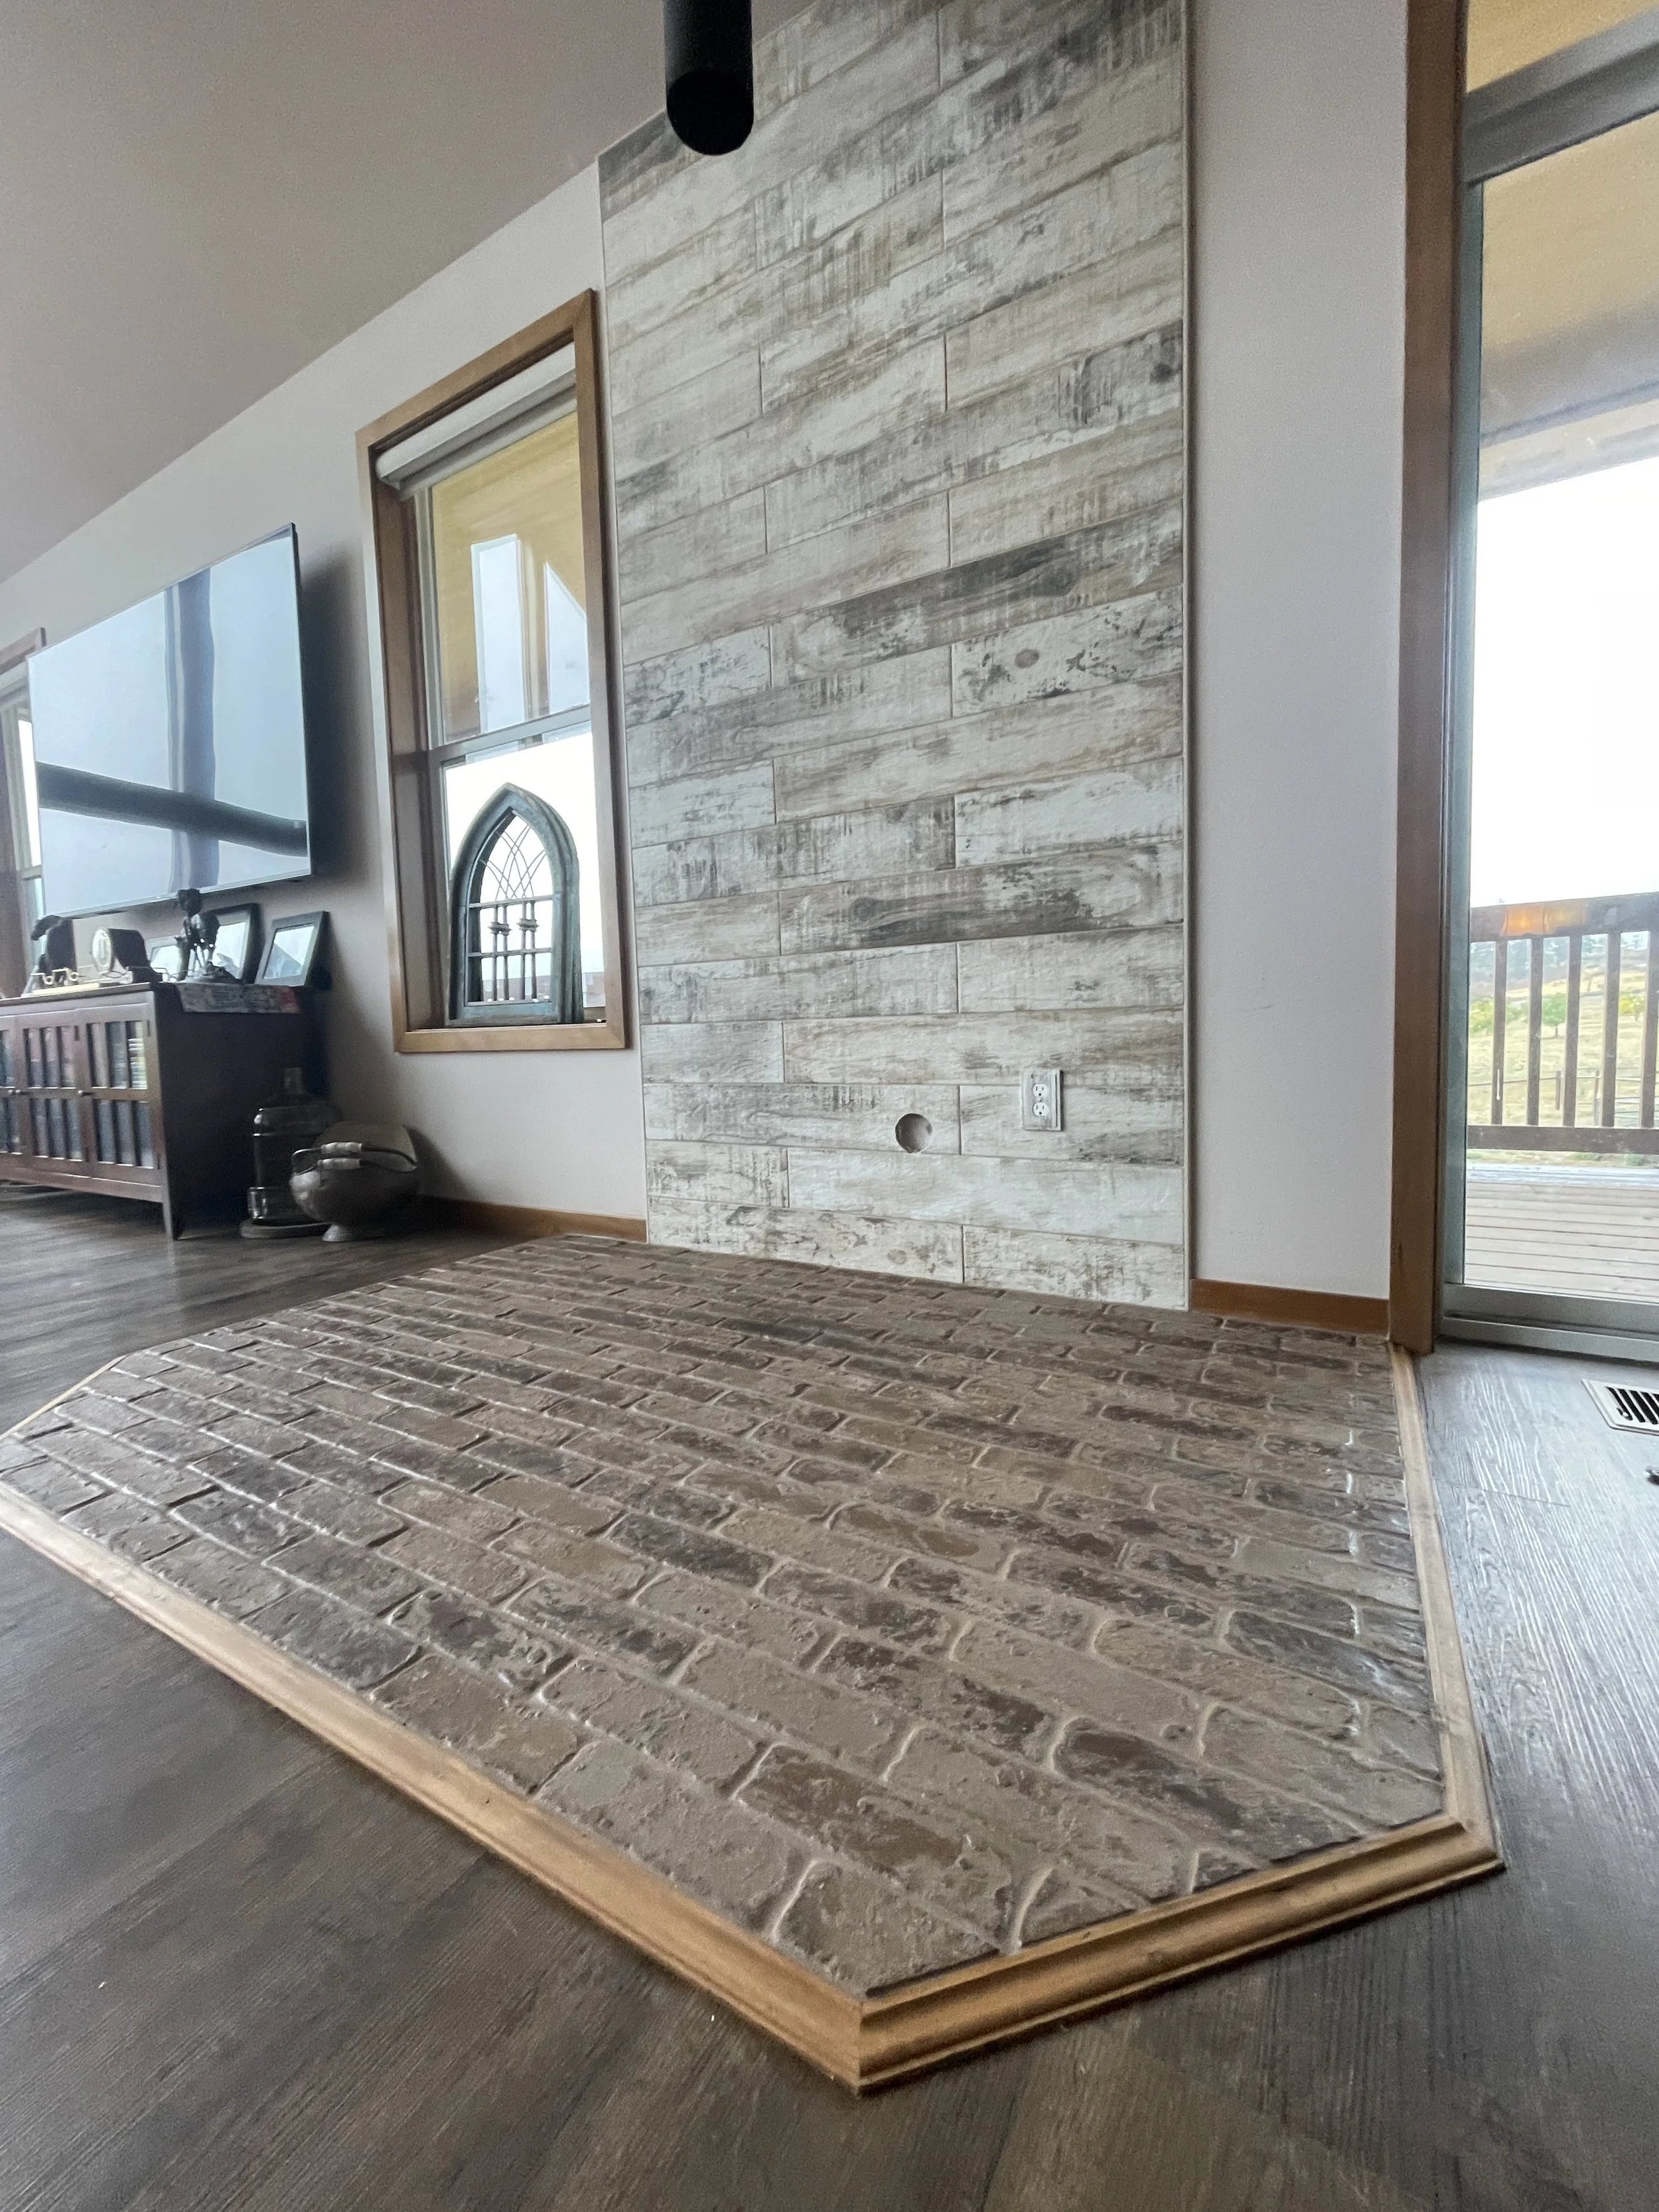
We picked out two different tiles. One is a weathered board style horizontal tile for the back wall. We also decided to leave it centered on the stove (which we decided would be in the same position, because messing with that ceiling is a whole ‘nother can of potential worms.) But instead of stopping abruptly at that 3-foot mark like the old ceramic tile, we decided to go all the way to the ceiling. The idea is that it would frame the vertical pipe when it is replaced, and sure enough, it really worked.
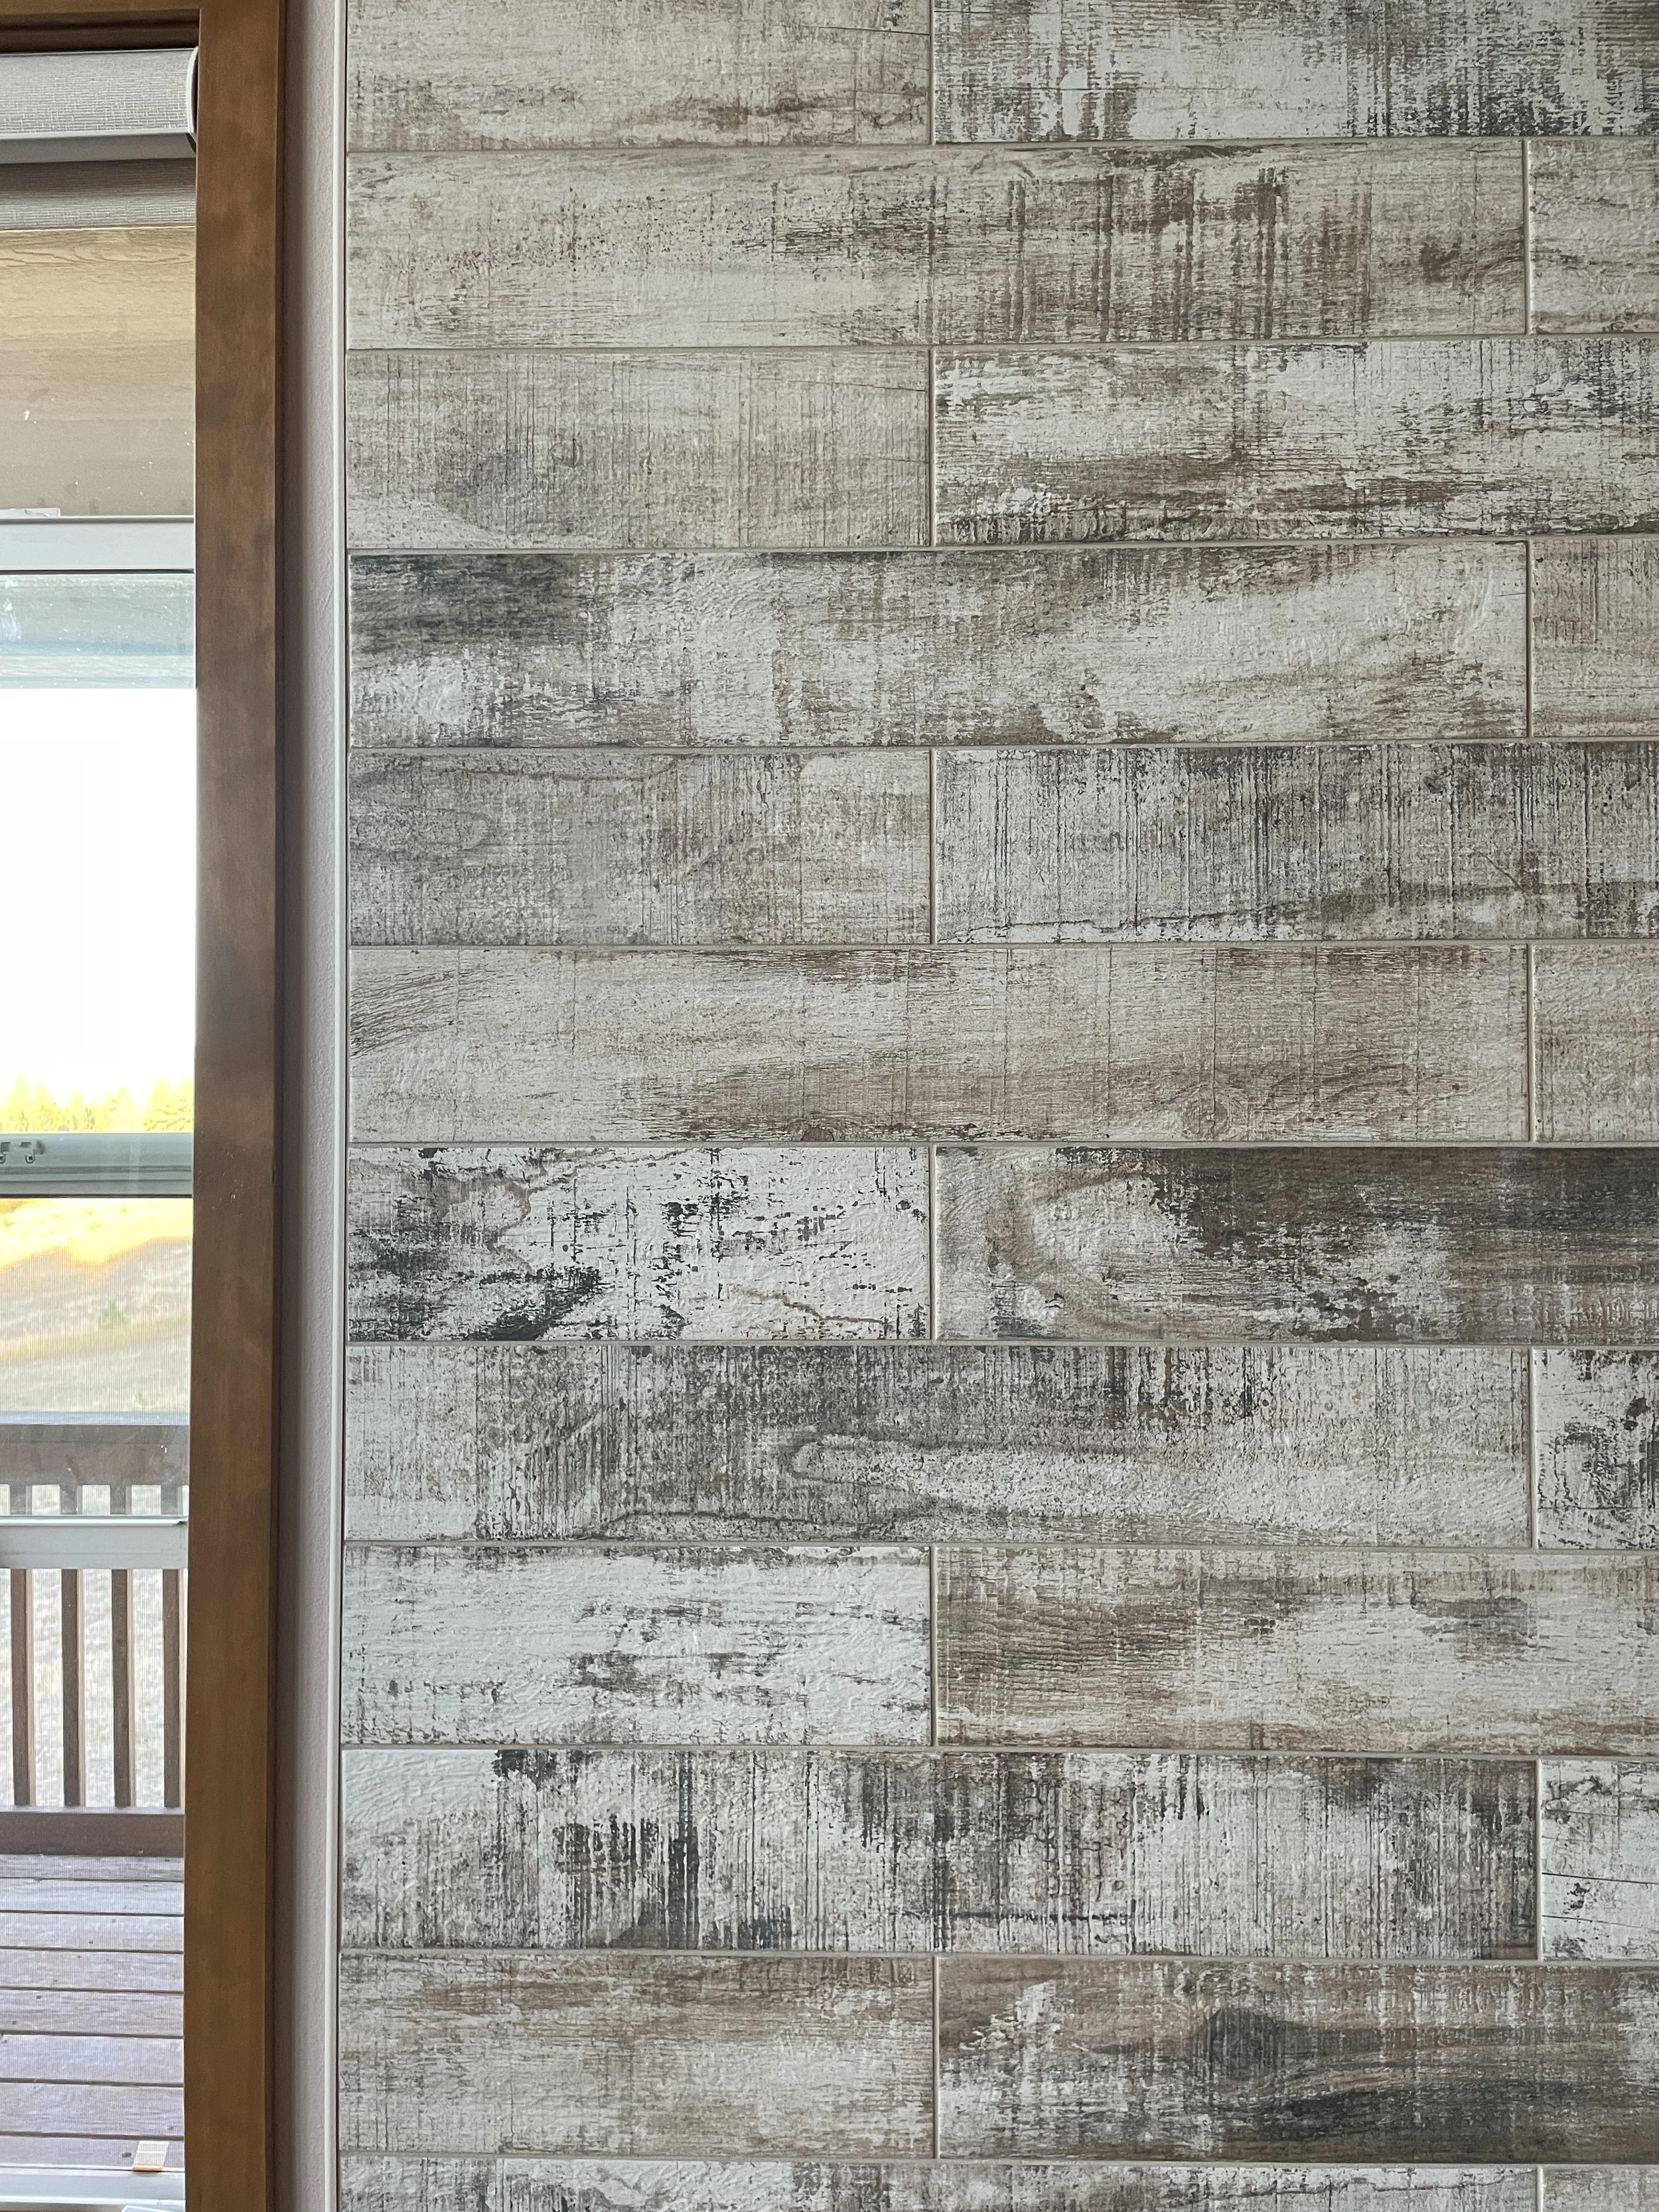
This wood-look tile is SO COOL. It went up like a dream, and we picked the right color grout (a slightly stressful decision, I might add.)
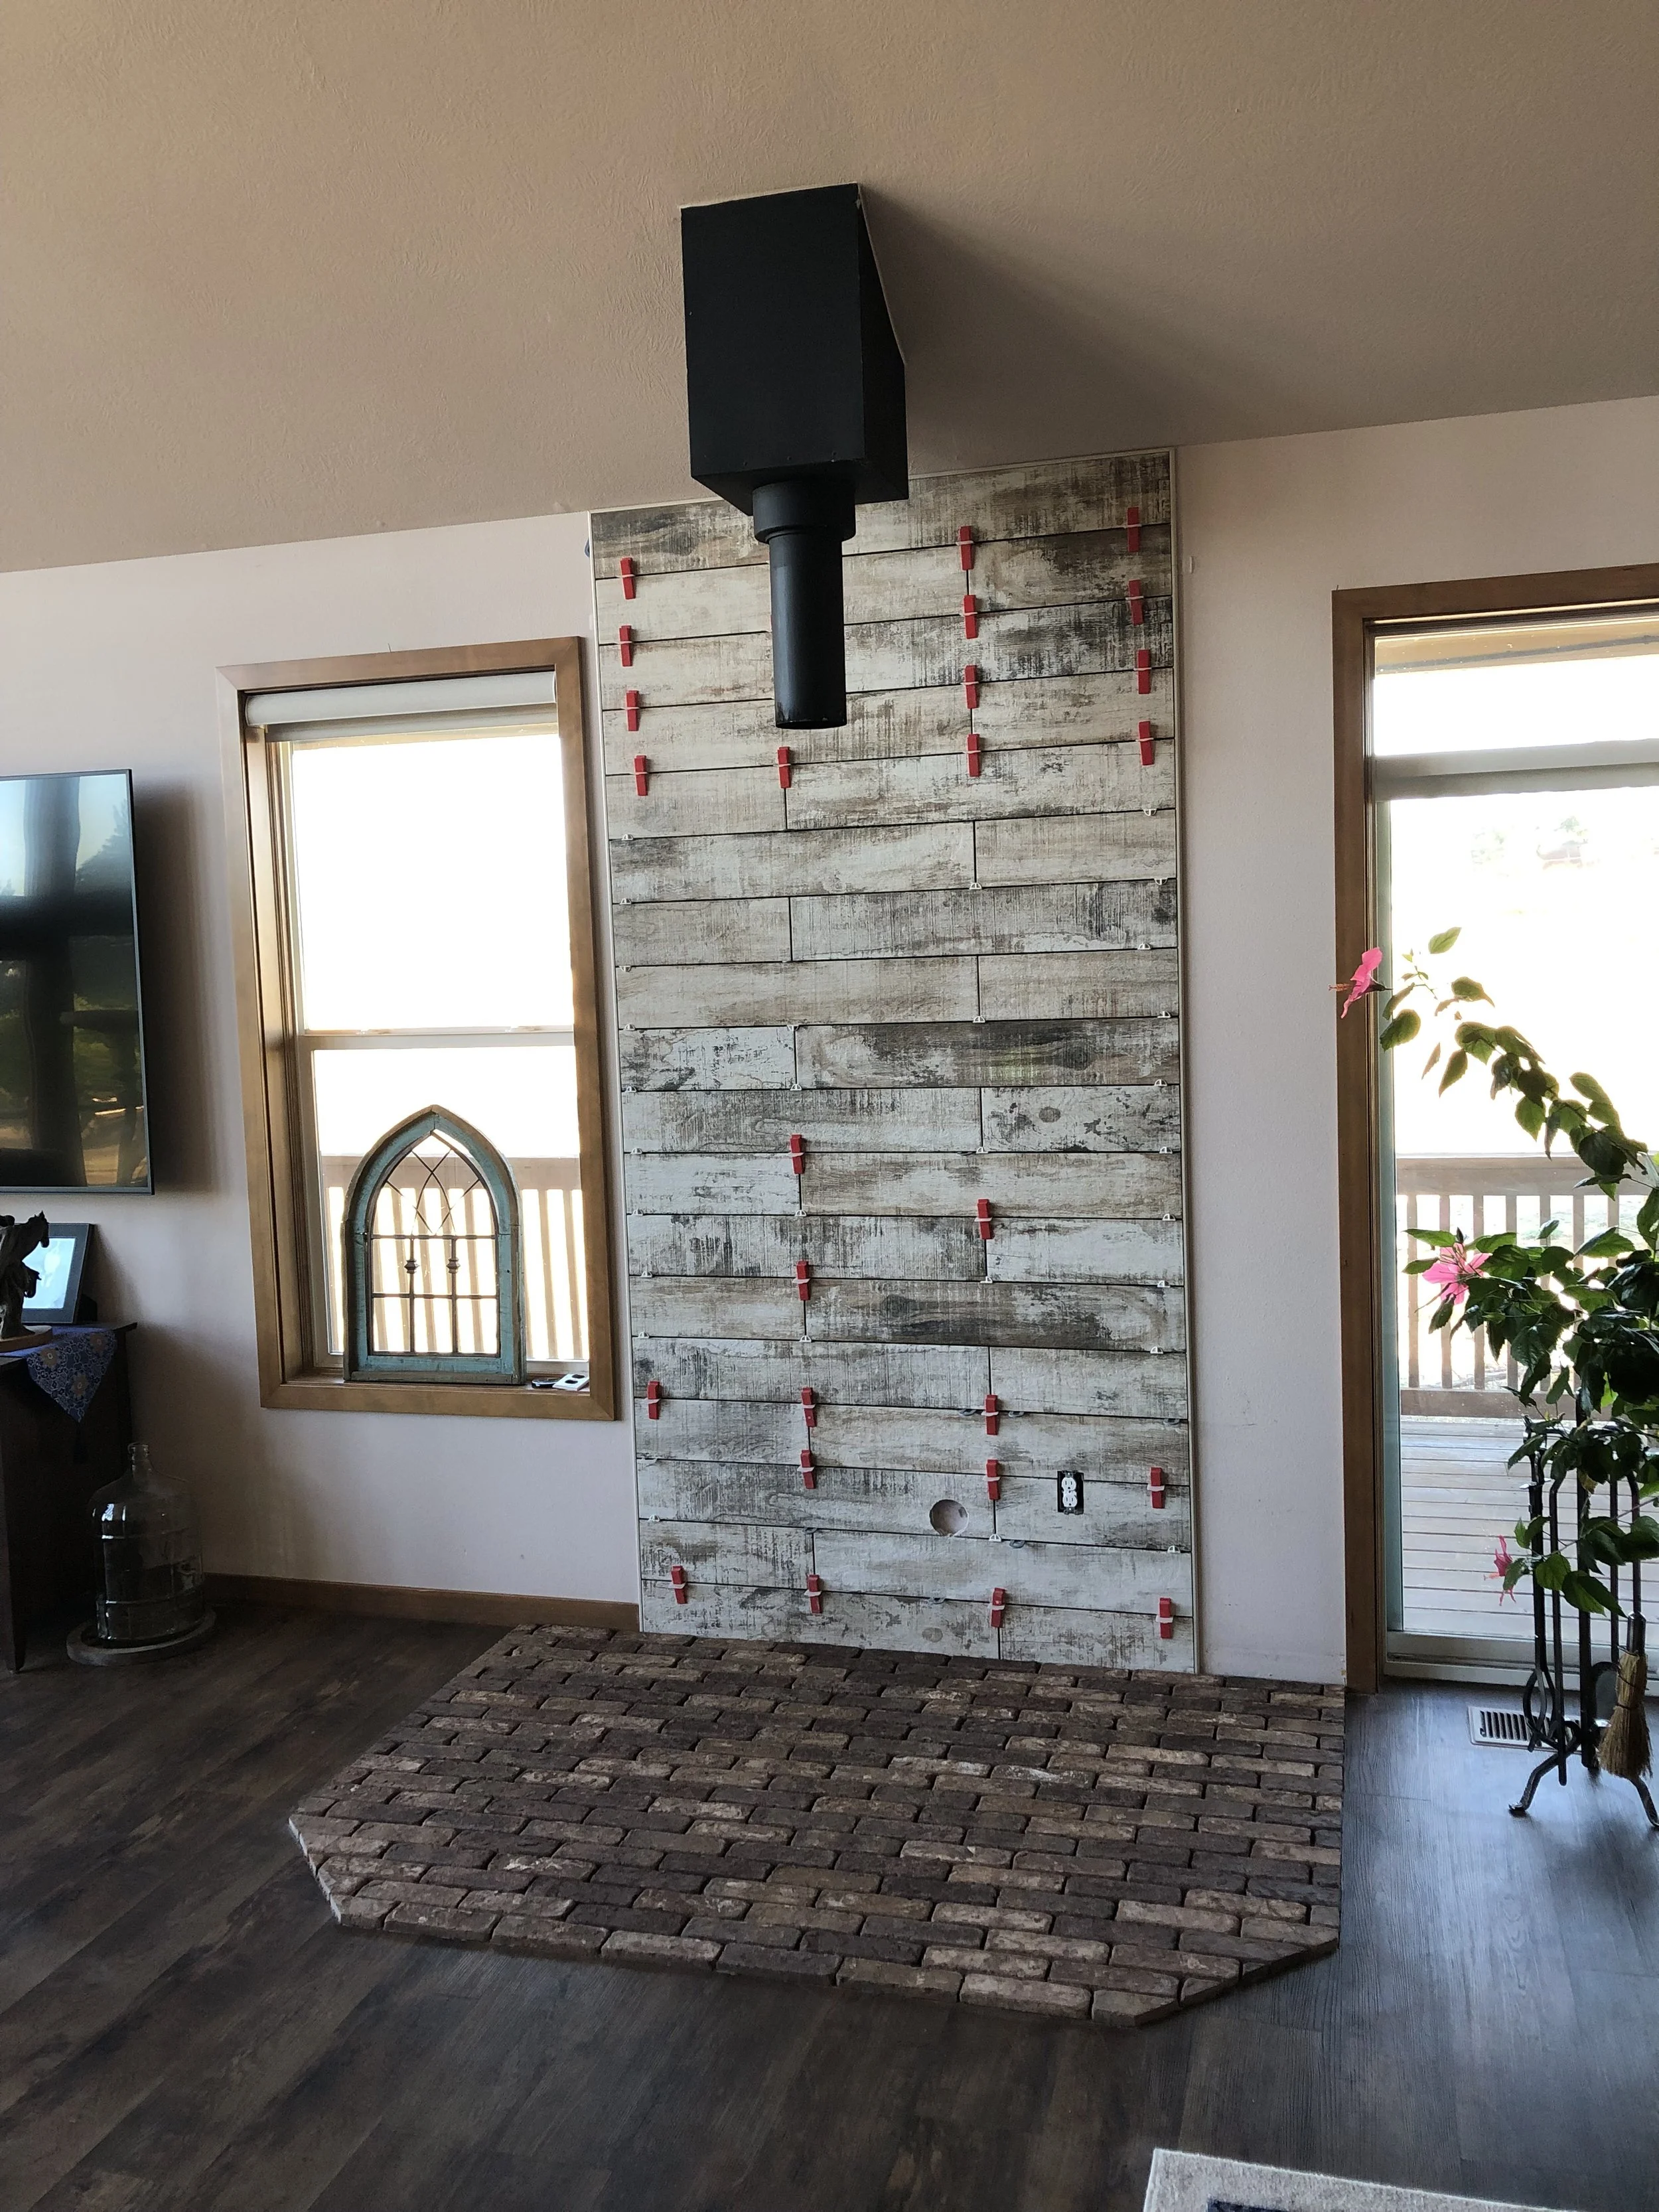
We decided to go with brick for the floor. We liked the idea of an “outdoor” feeling to the brick under the stove. Because of the weird centering design we were attempting, by the suggestion of our tile designer, we decided to extend the brick on the floor about a foot on either side vs. lining it up with the vertical tile. Again, we were nervous about this choice, but visually it absolutely did the trick of emphasizing the centering on the to-be-replaced vertical pipe and the stove vs. the windows.
The problem was the brick itself, though. Specifically, the color that we chose. When the brick was placed, I absolutely HATED it. It looks like a 1970’s ranch brick. I think the Brady Bunch had this brick. I almost broke out a can of white paint to whitewash it. Steve hid all of the paintbrushes in the house and encouraged me to give it time.

Gorgeous wall; ugly brick!
Yuck. Despondent!
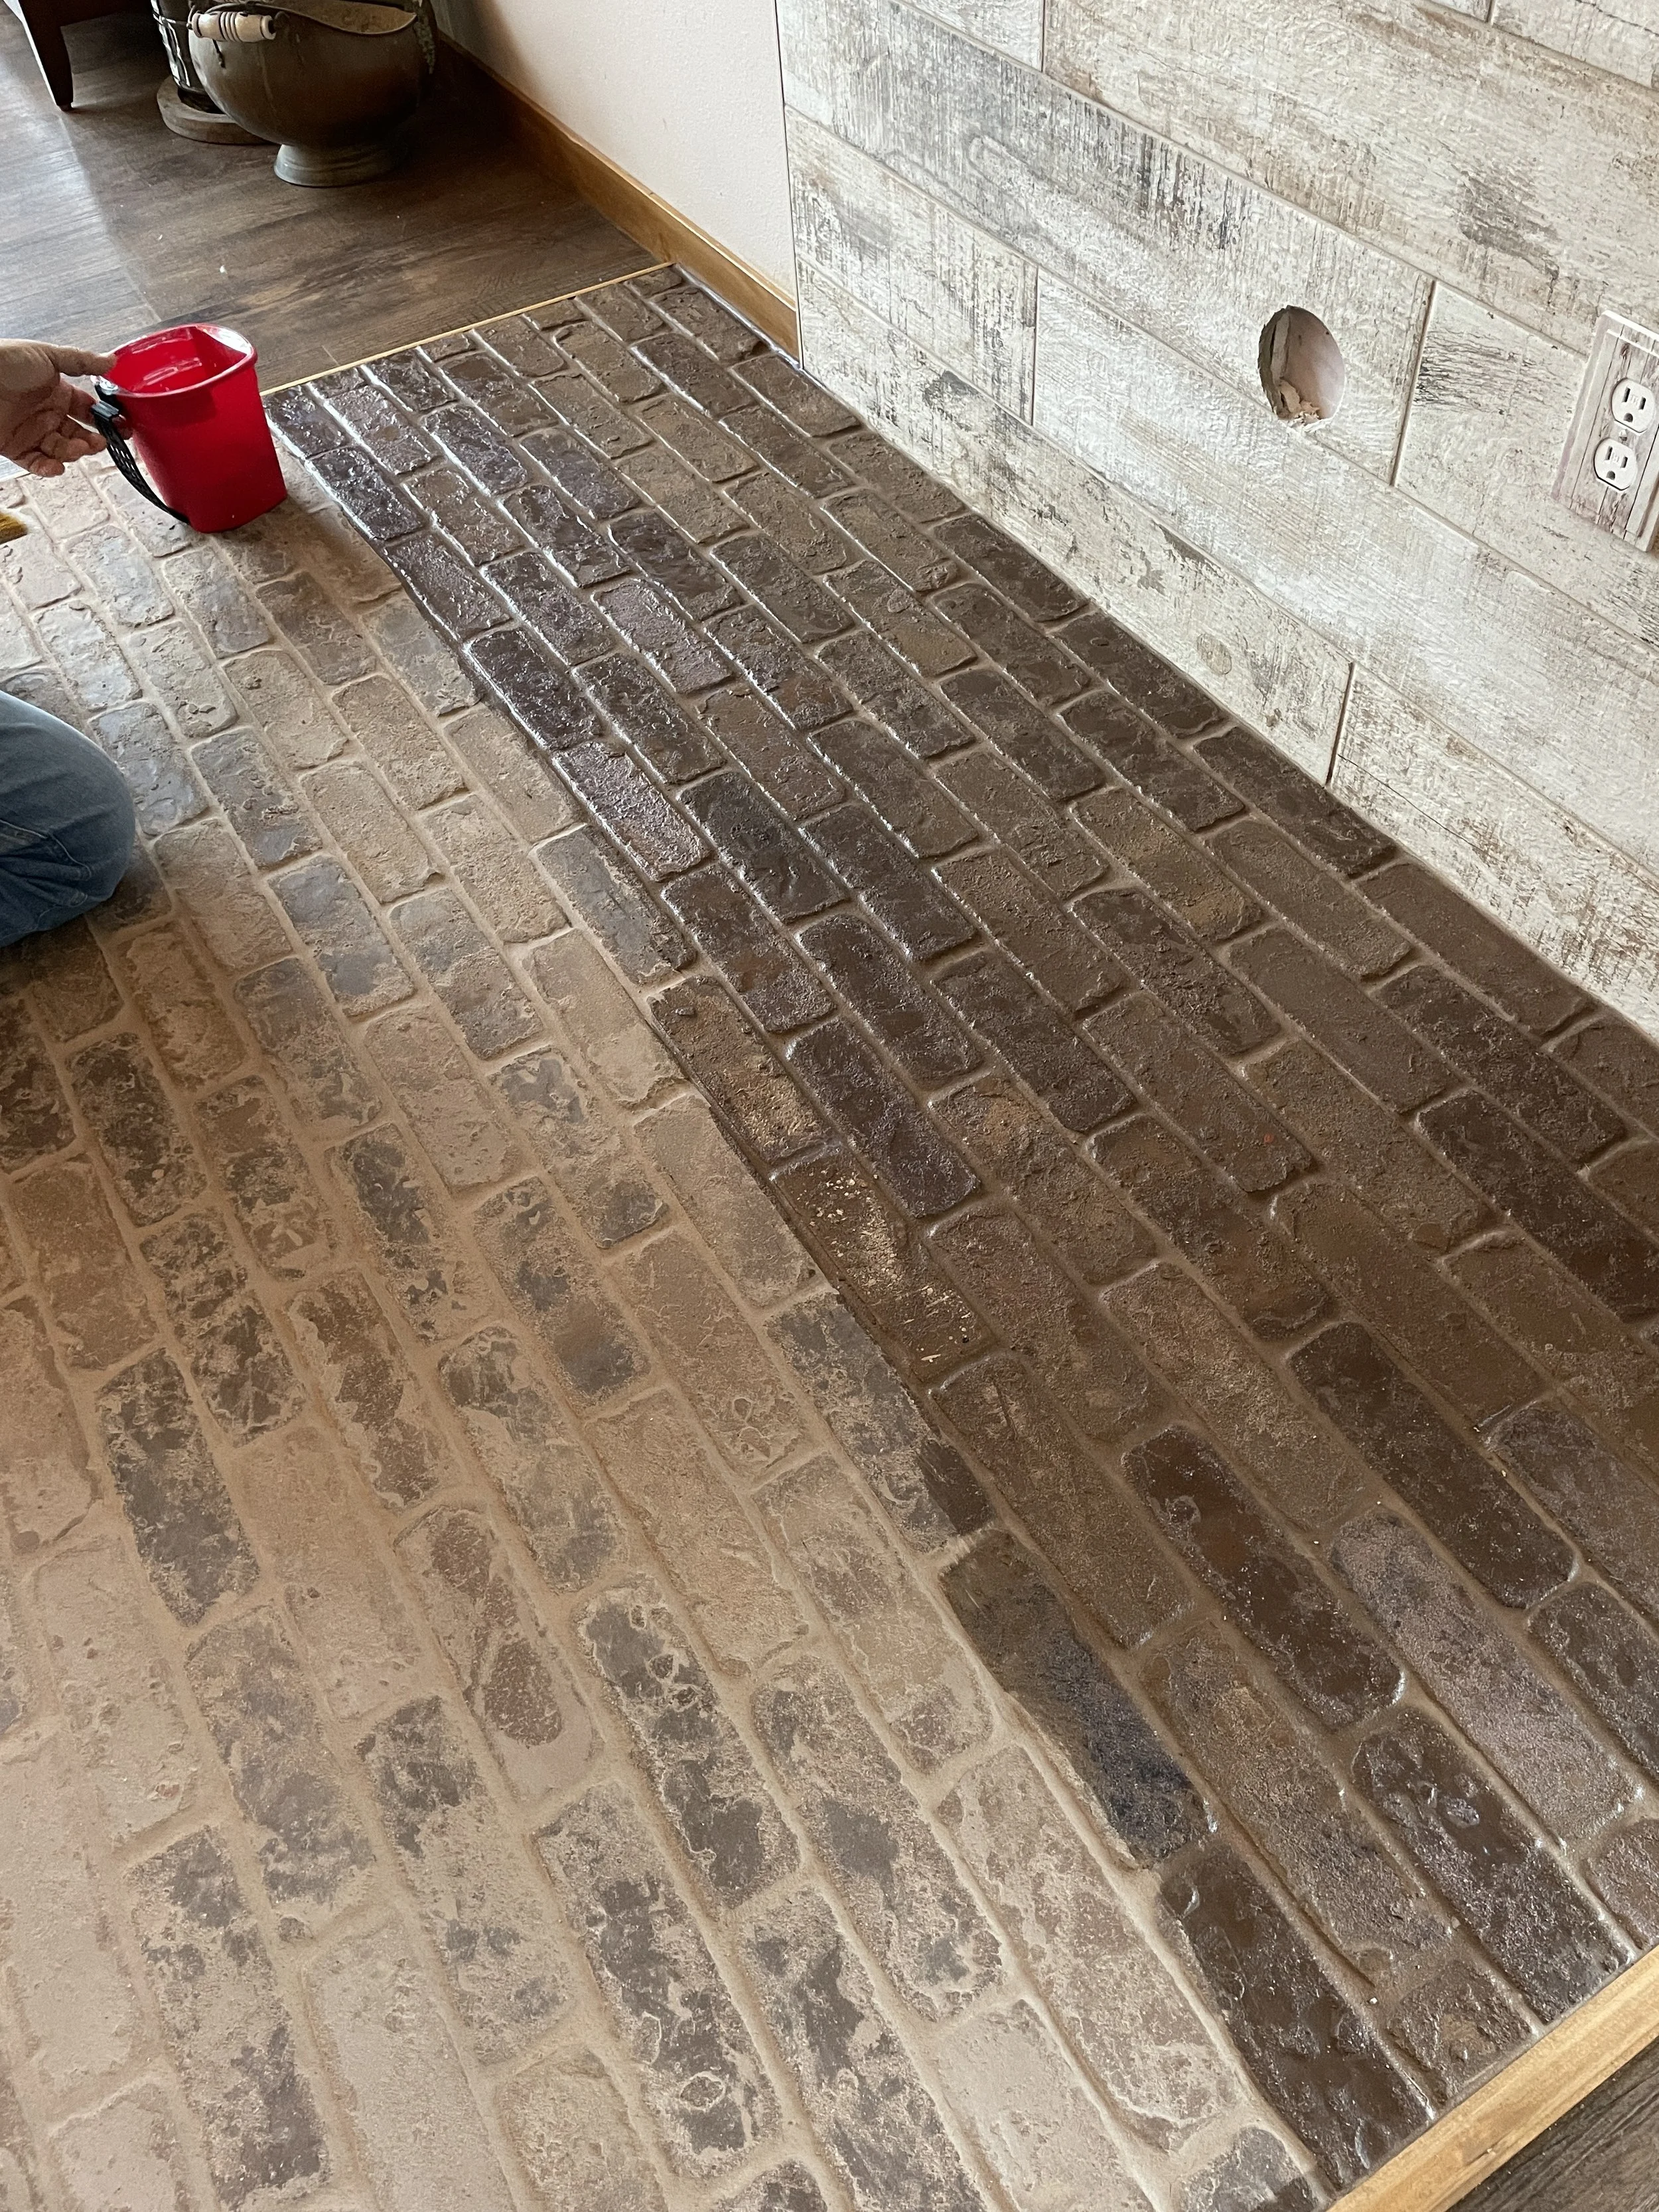
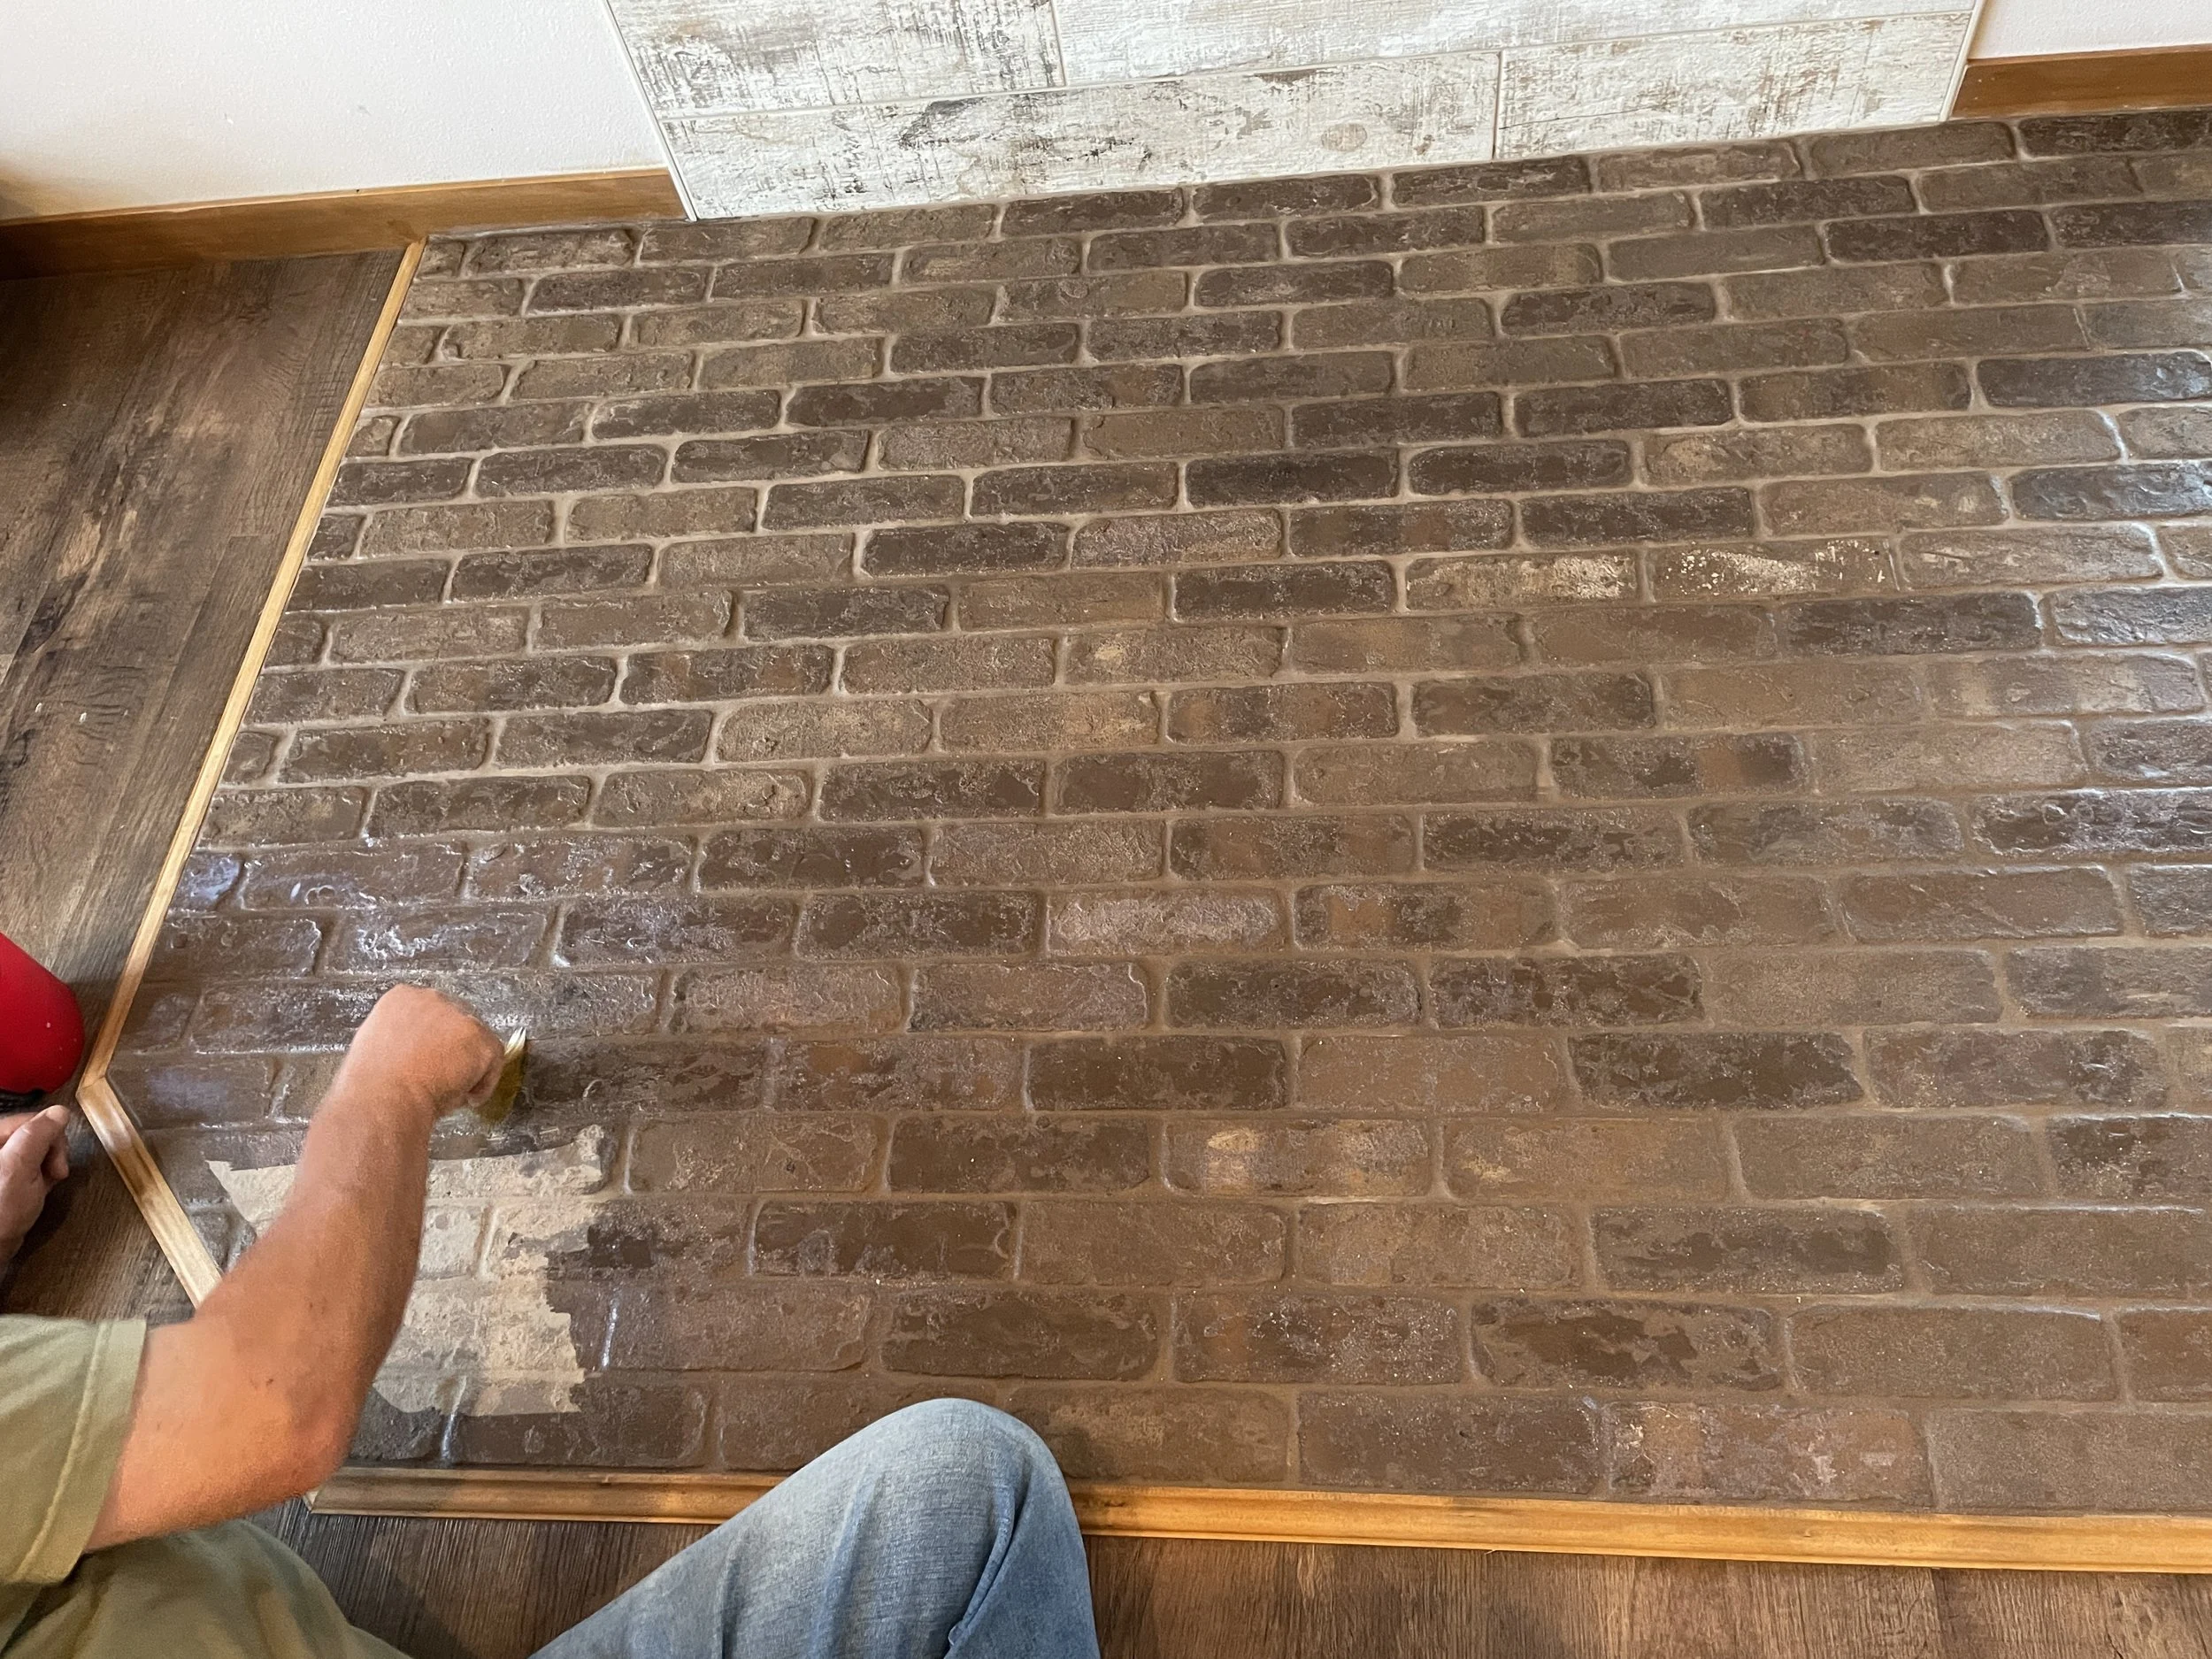
Then the grouting process started. We are not honestly sure why grouting the brick left a film over the brick, because that wouldn’t be the case if it were ceramic tile - it would wipe off. But we didn’t say anything, because we actually LIKED what it was doing to cover up/”weather” the ugly brick. So we let the process work out.
One of our Ukranian tilers starting in on the grouting. It almost looked like paint going on. Also you can see that Steve hadn’t yet stained the wood trim at this point.

The tile guys actually ran out of grout, so this is what they left us with on the first day. As the grout dried, it really improved the color of the tile. This is not yet cleaned up or applied sealant. But it was heading the right direction for me!


Unsealed/unstained but much more worn-looking vs. Brady Bunch. I should note that Steve actually liked the ugly Brady Bunch brick because he seems to like everything from 1975, but he was overruled.

Steve stained the trim and started applying the sealant. Again, our nerves were frazzled, since we had no idea at this point what the finished product was going to look like!

Chester watching the action closely.

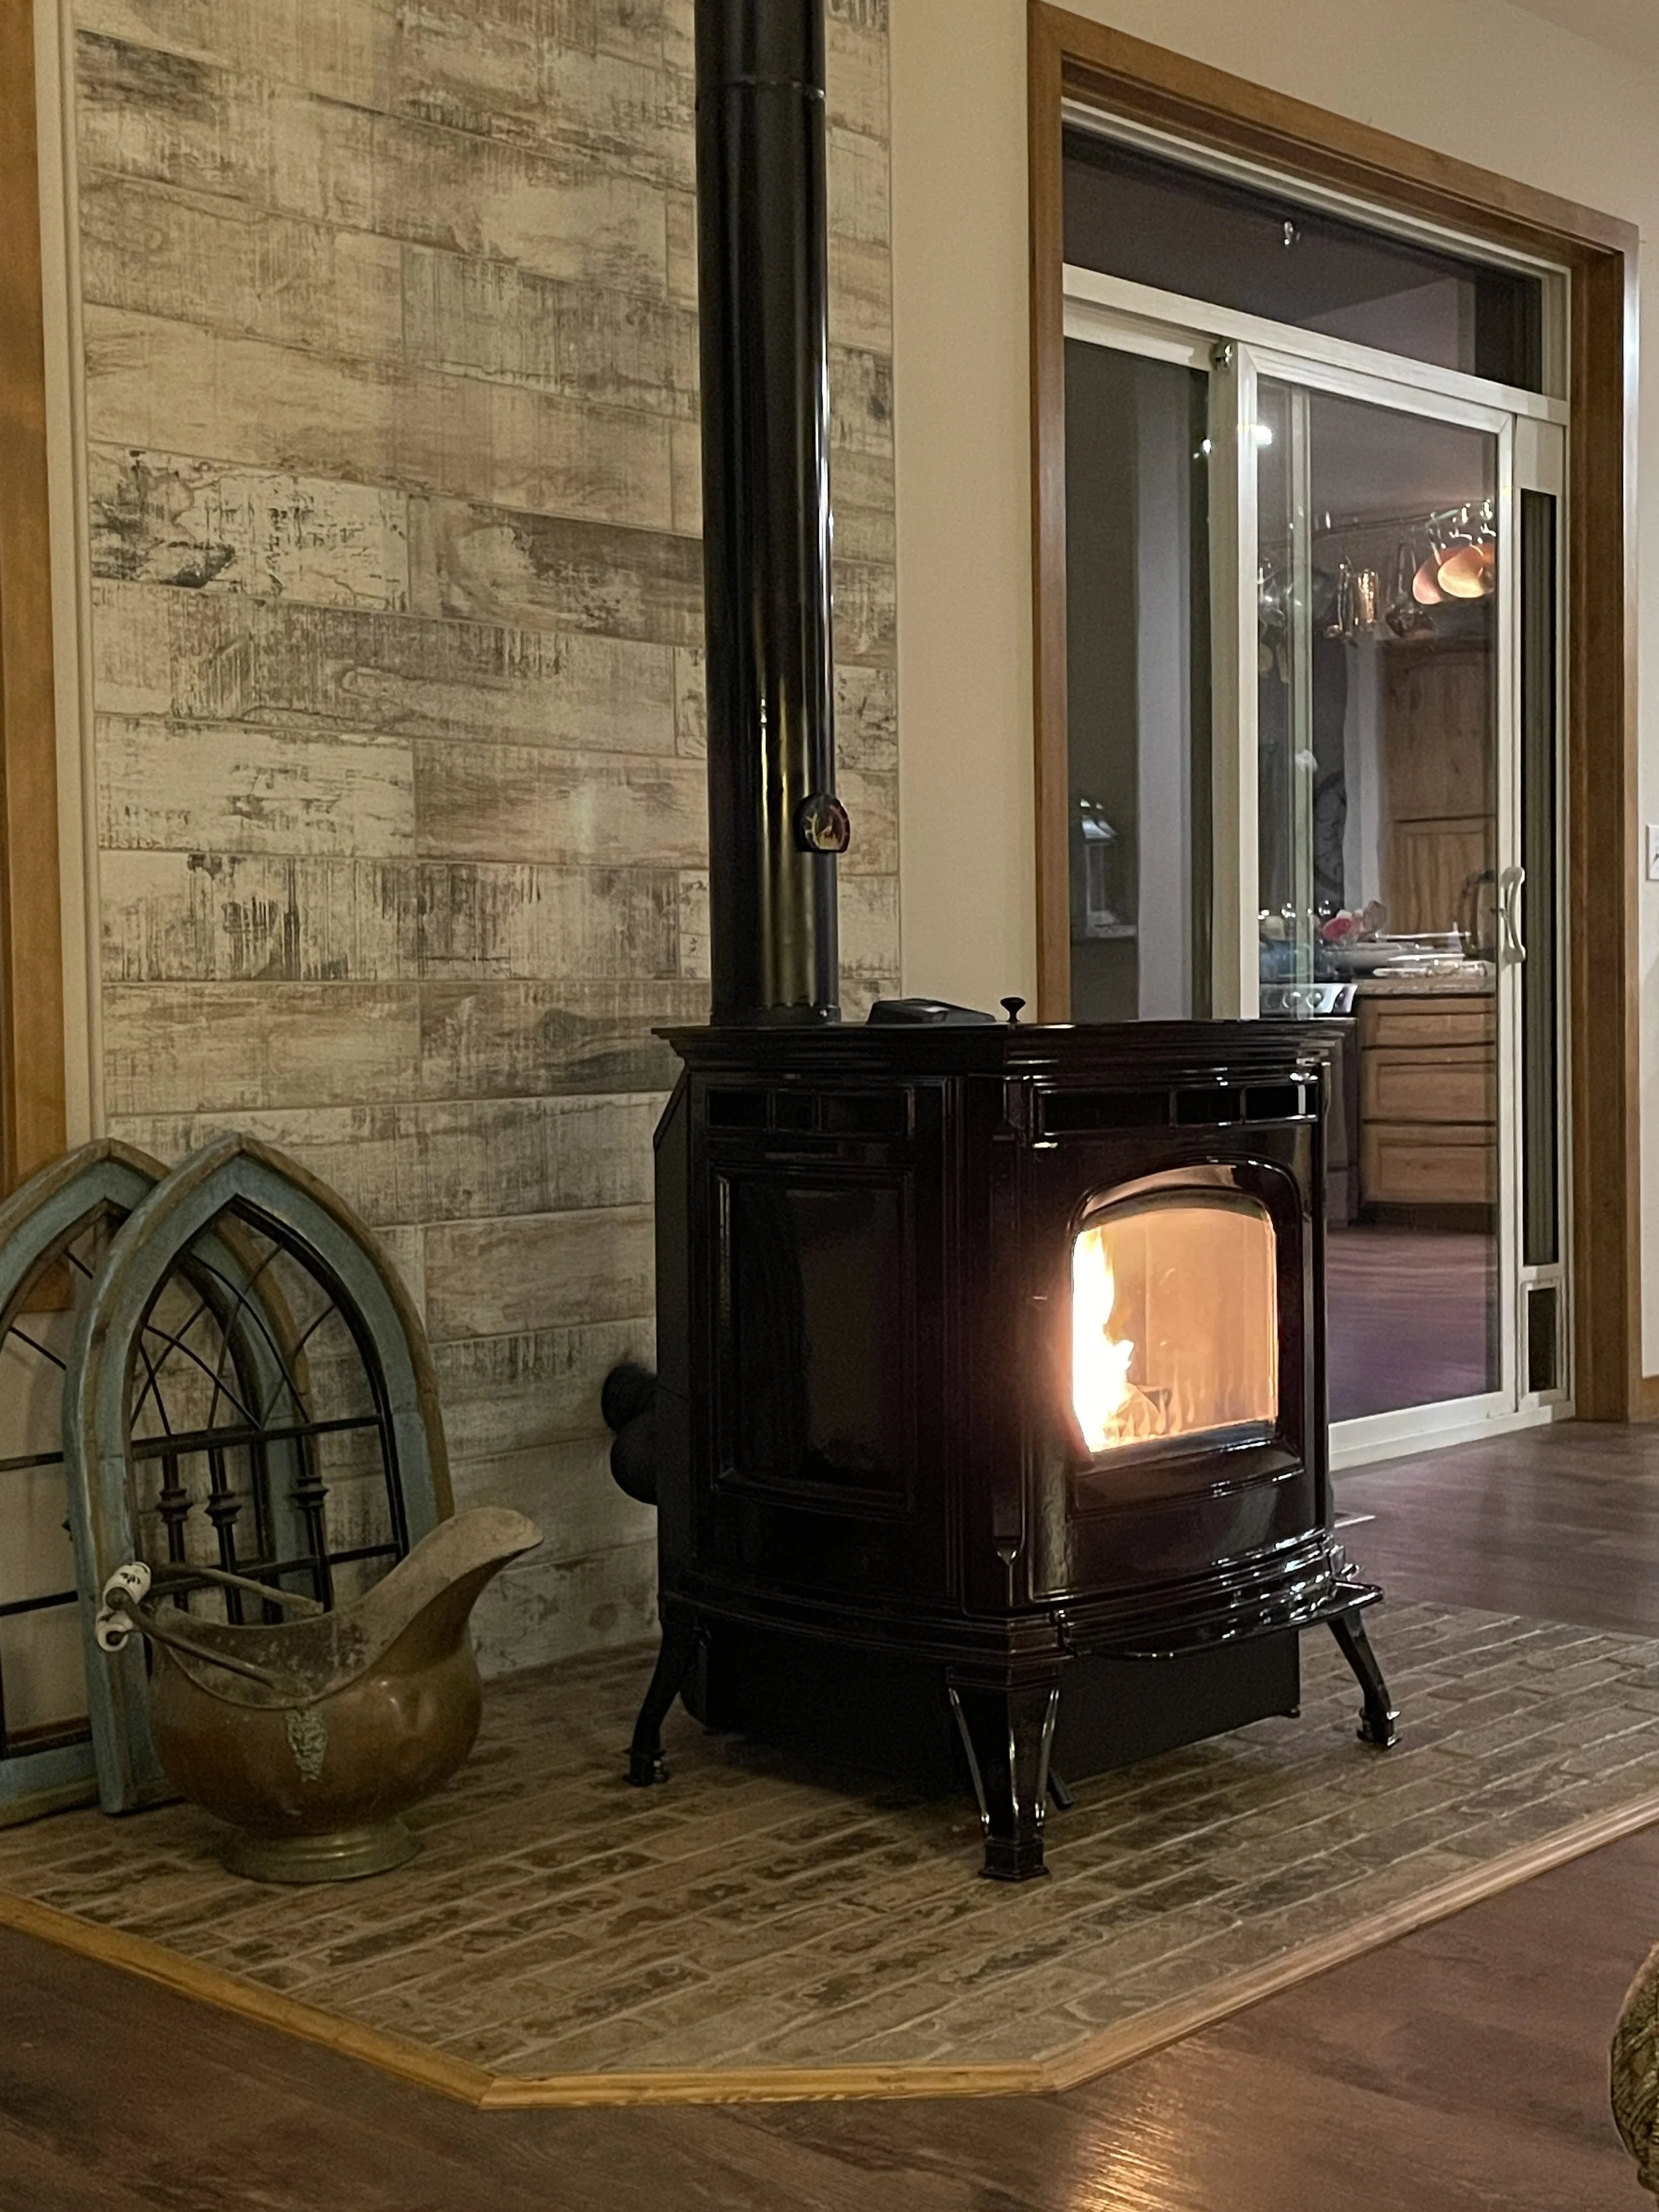
Sealant dried, and color MUCH better! We like the crumbly look. I think Steve added another layer of darker stain on the trim after this picture, it looks a little light here. So now we waited for the new pellet stove to be delivered.

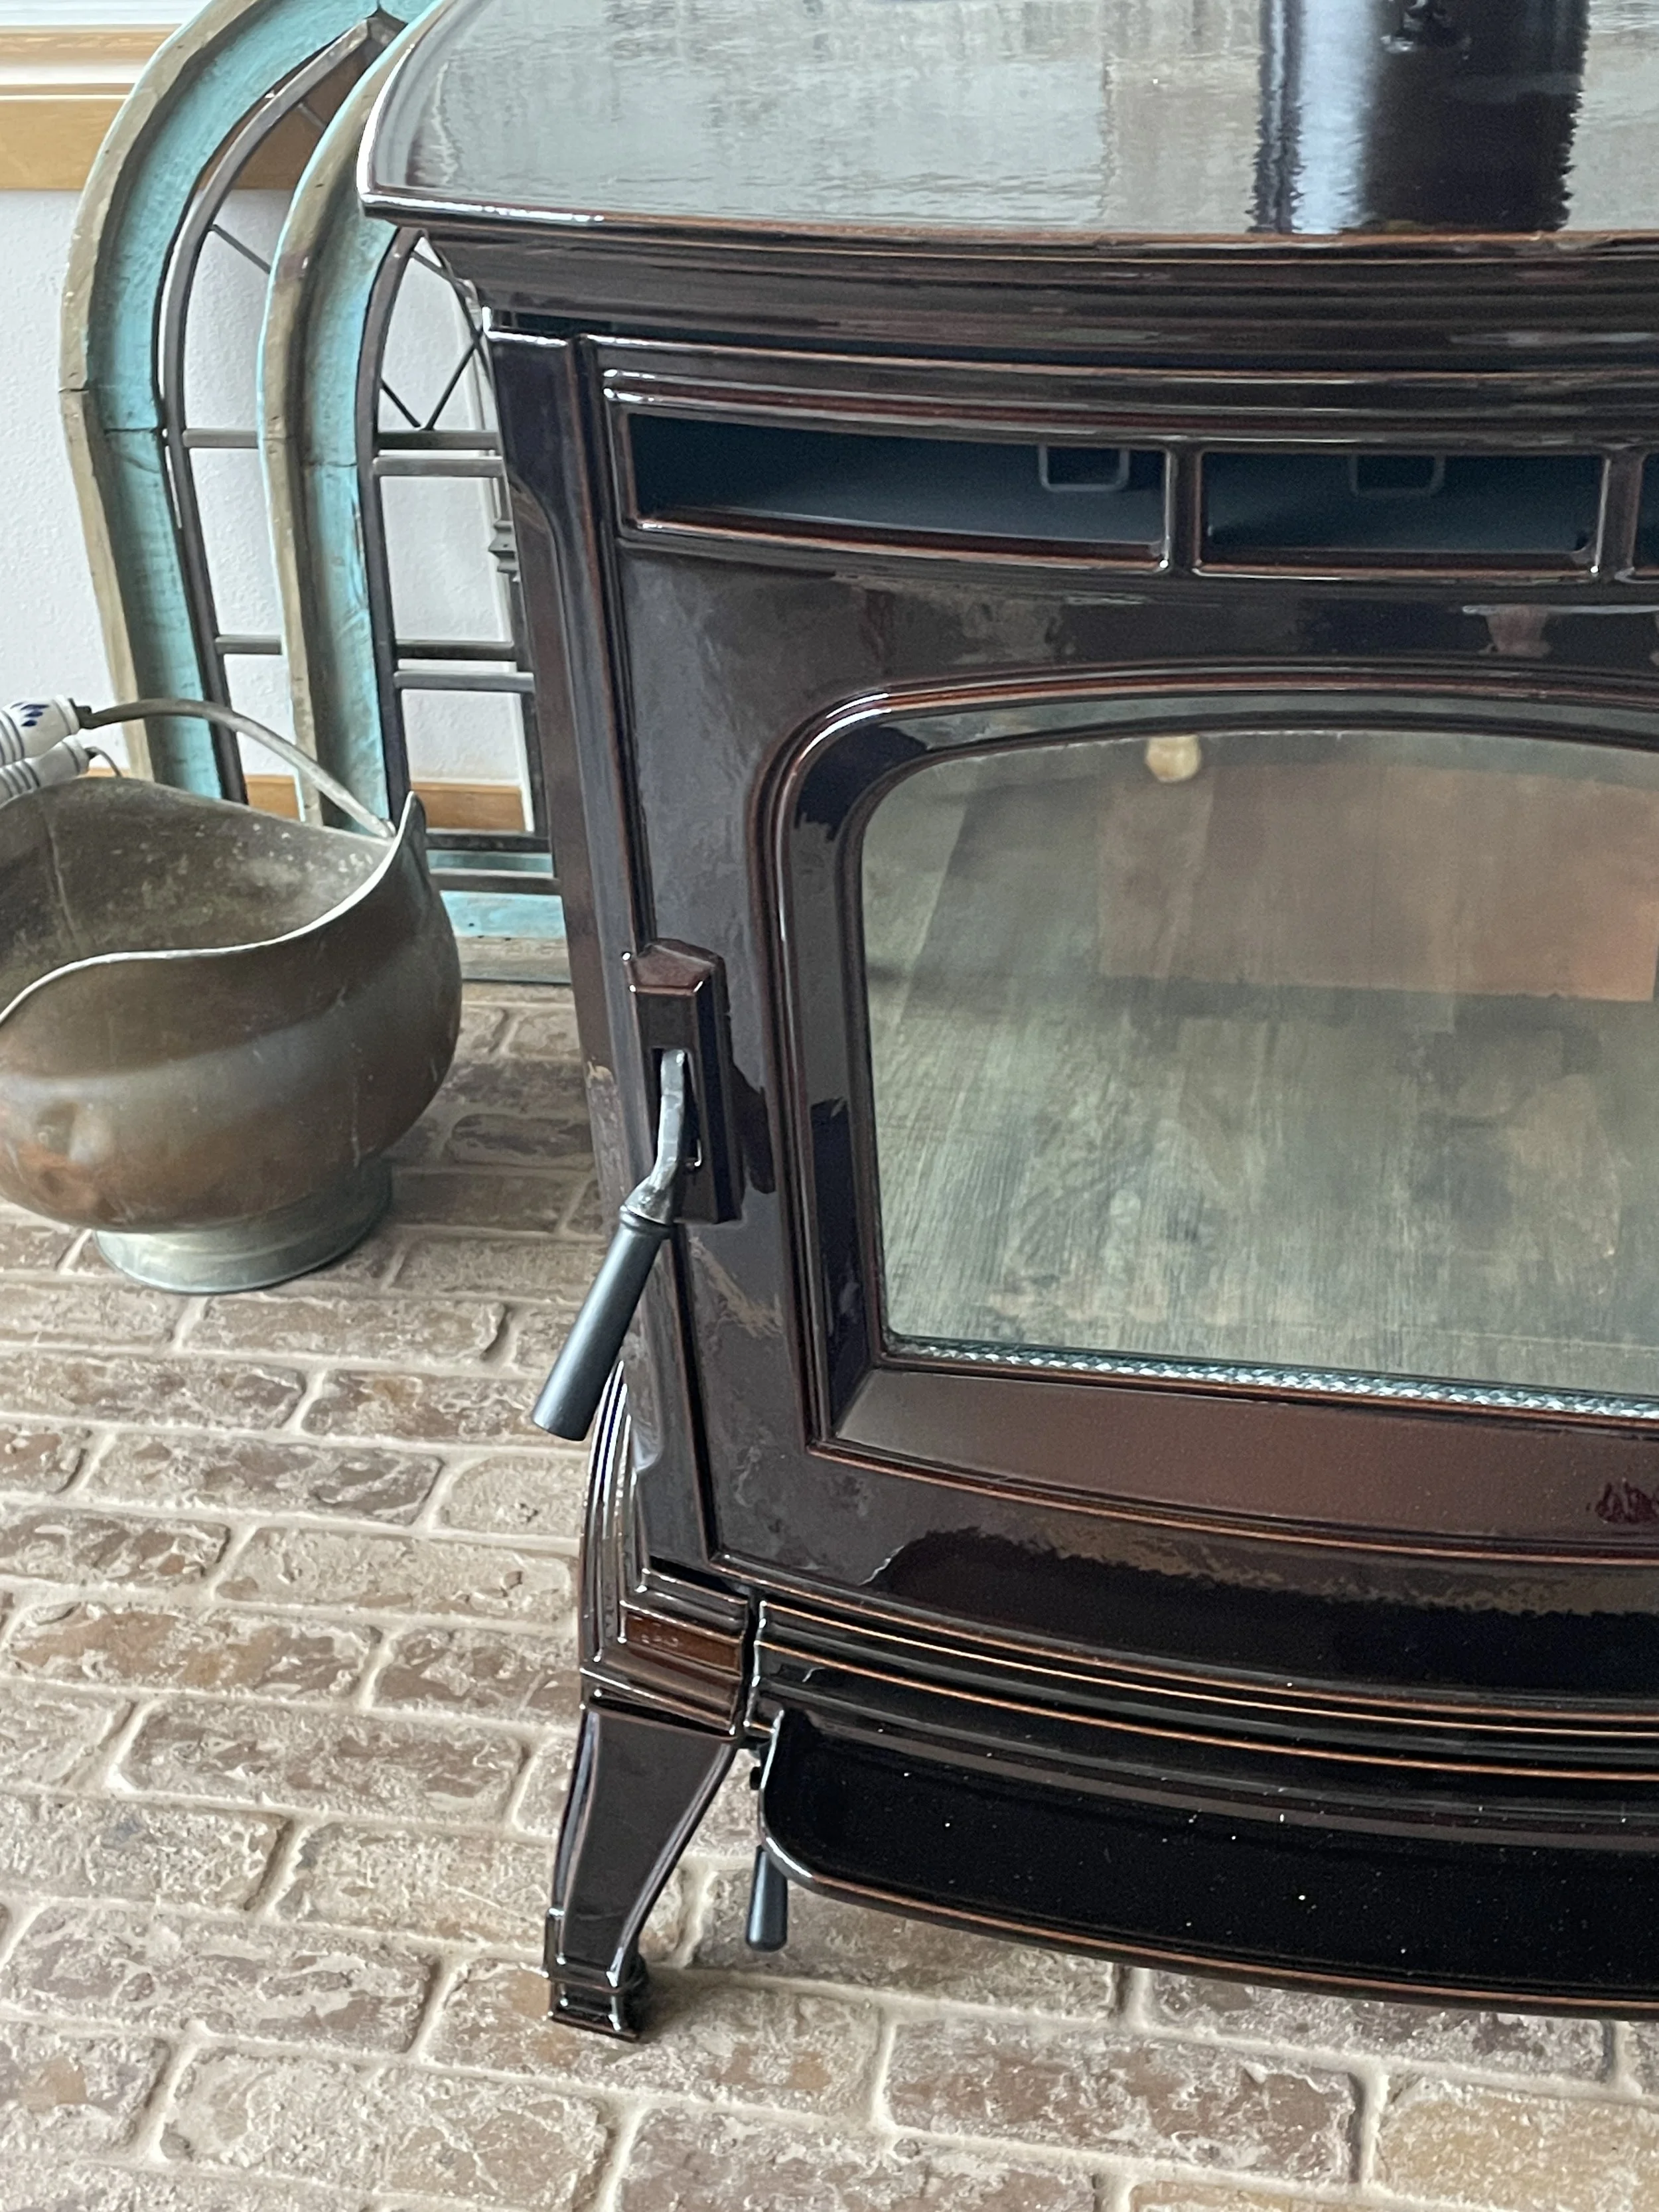
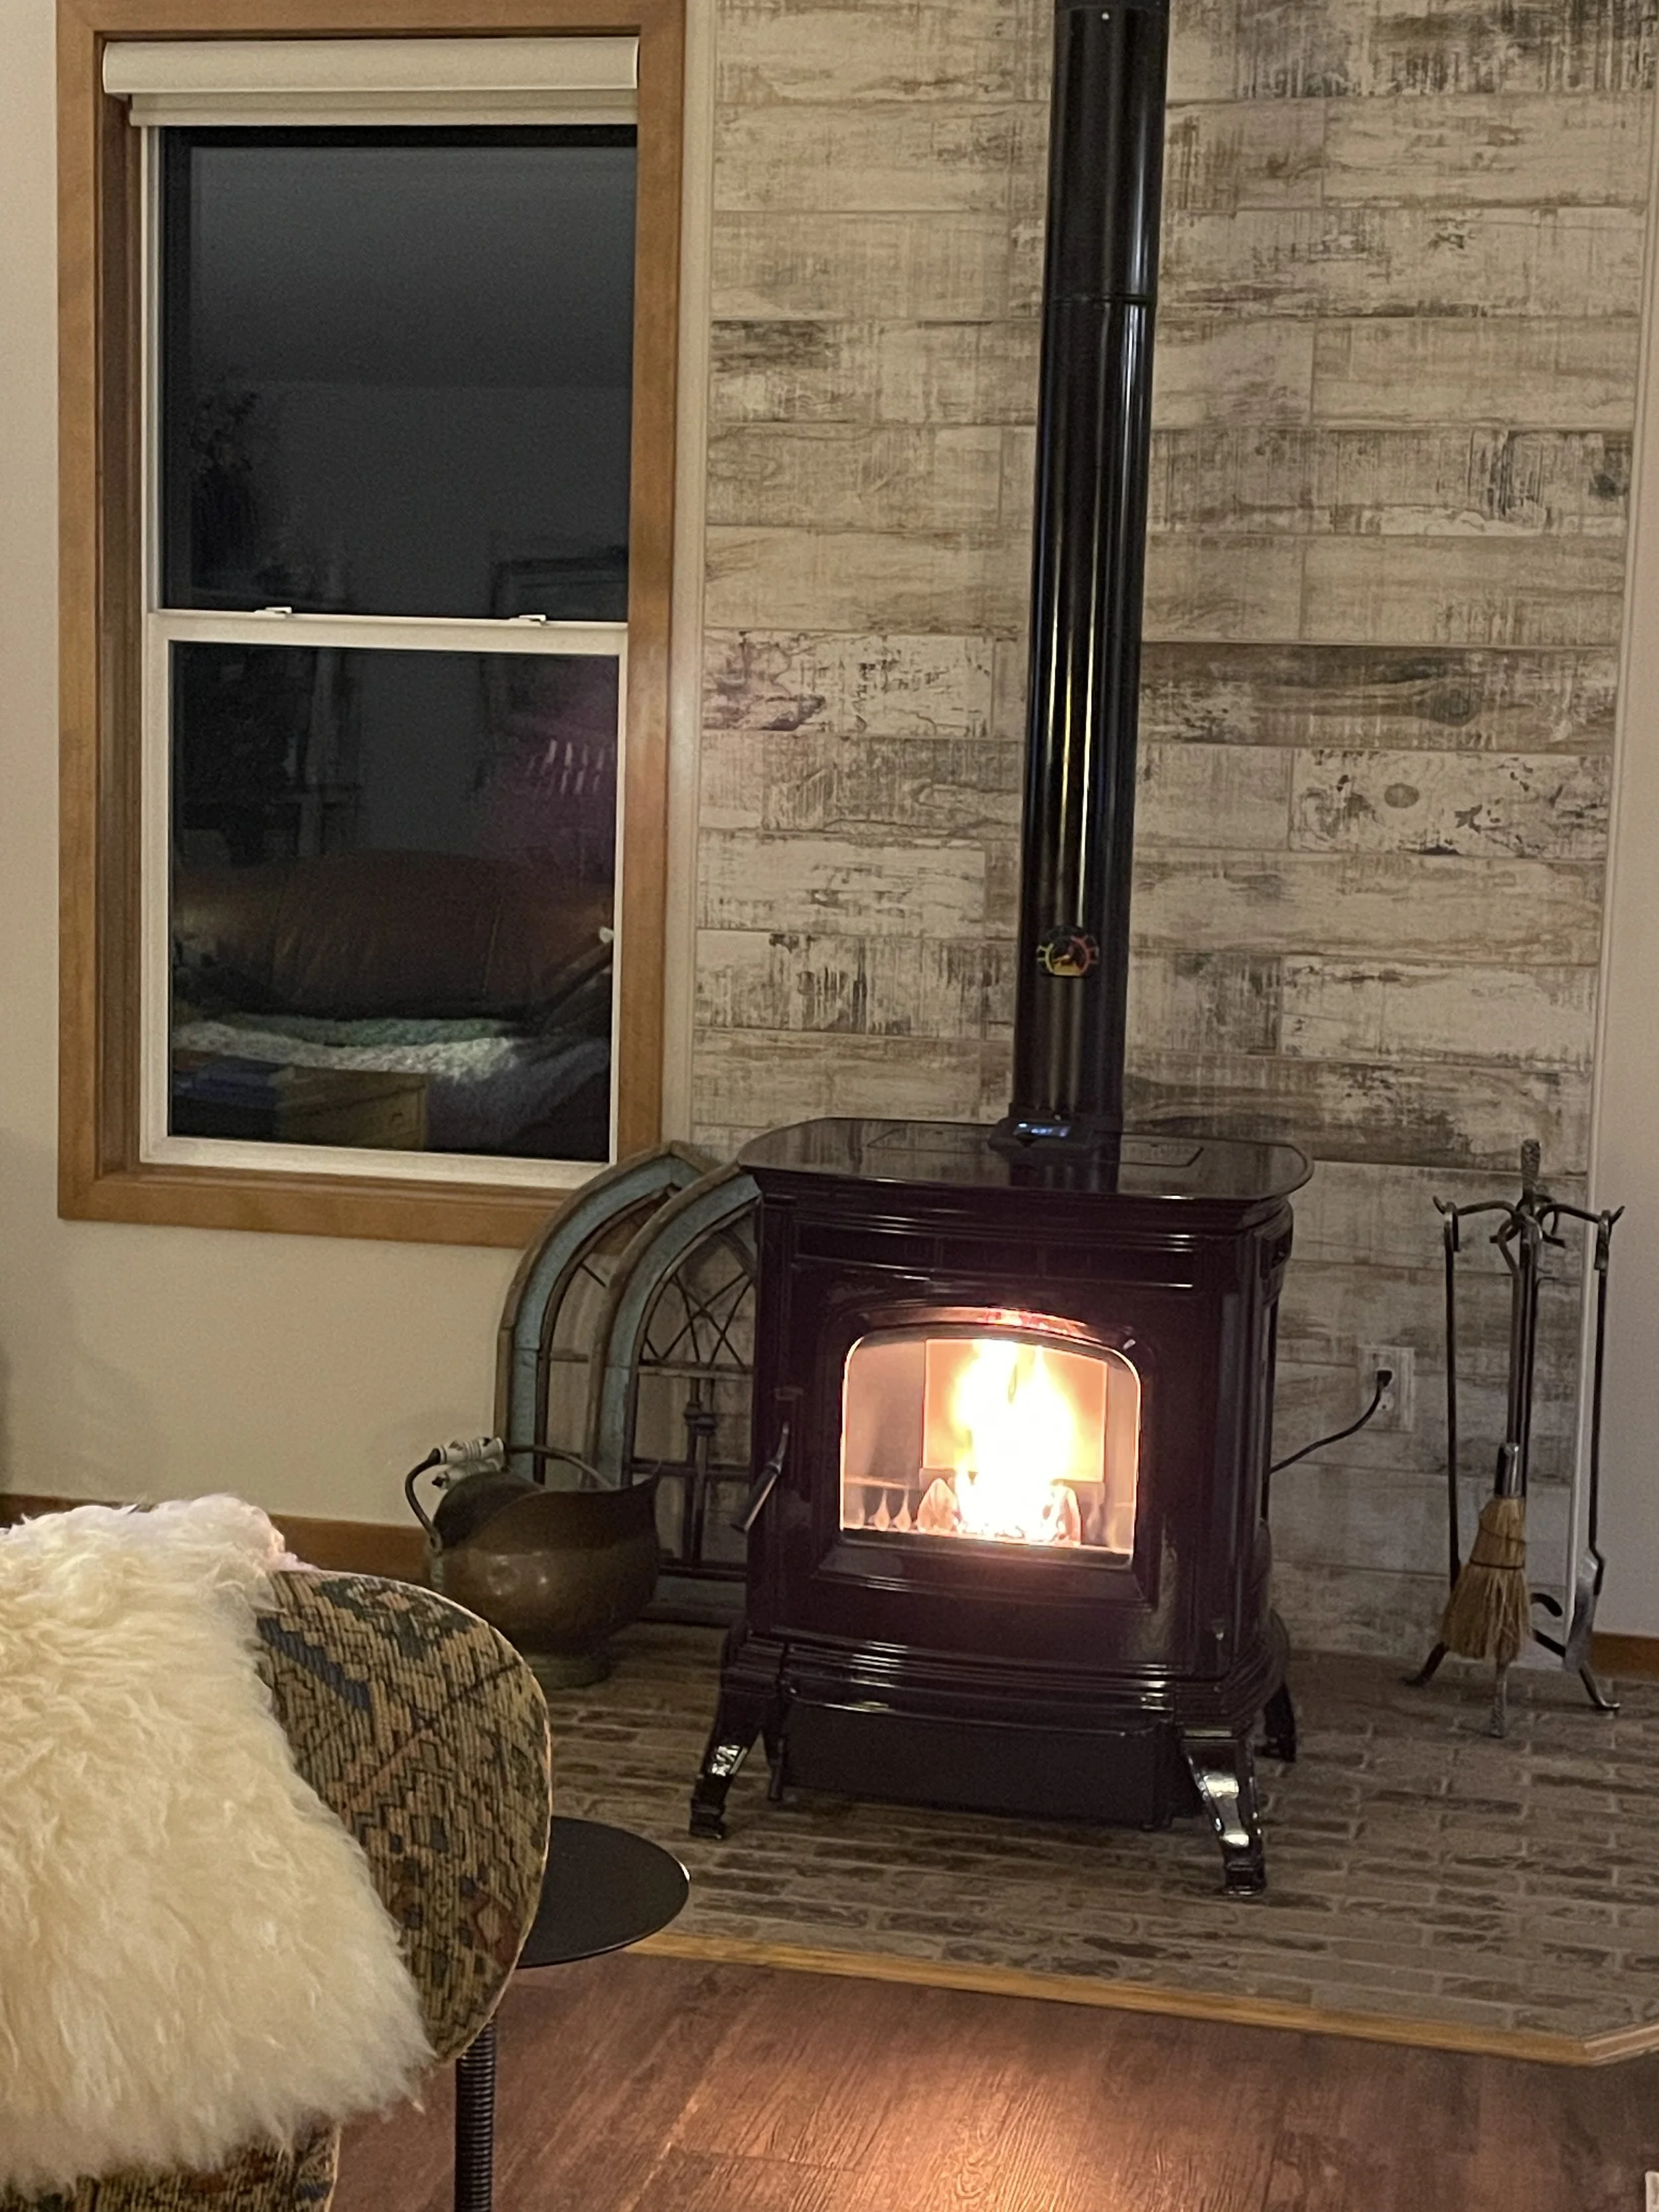
And there she is! A glossy dark brown, and BOY does she crank out the heat!

We already moved the hibiscus tree to the corner and my chair from the corner to the spot closest to the fire, because like a cat I LOVE being boiling hot by a fire!
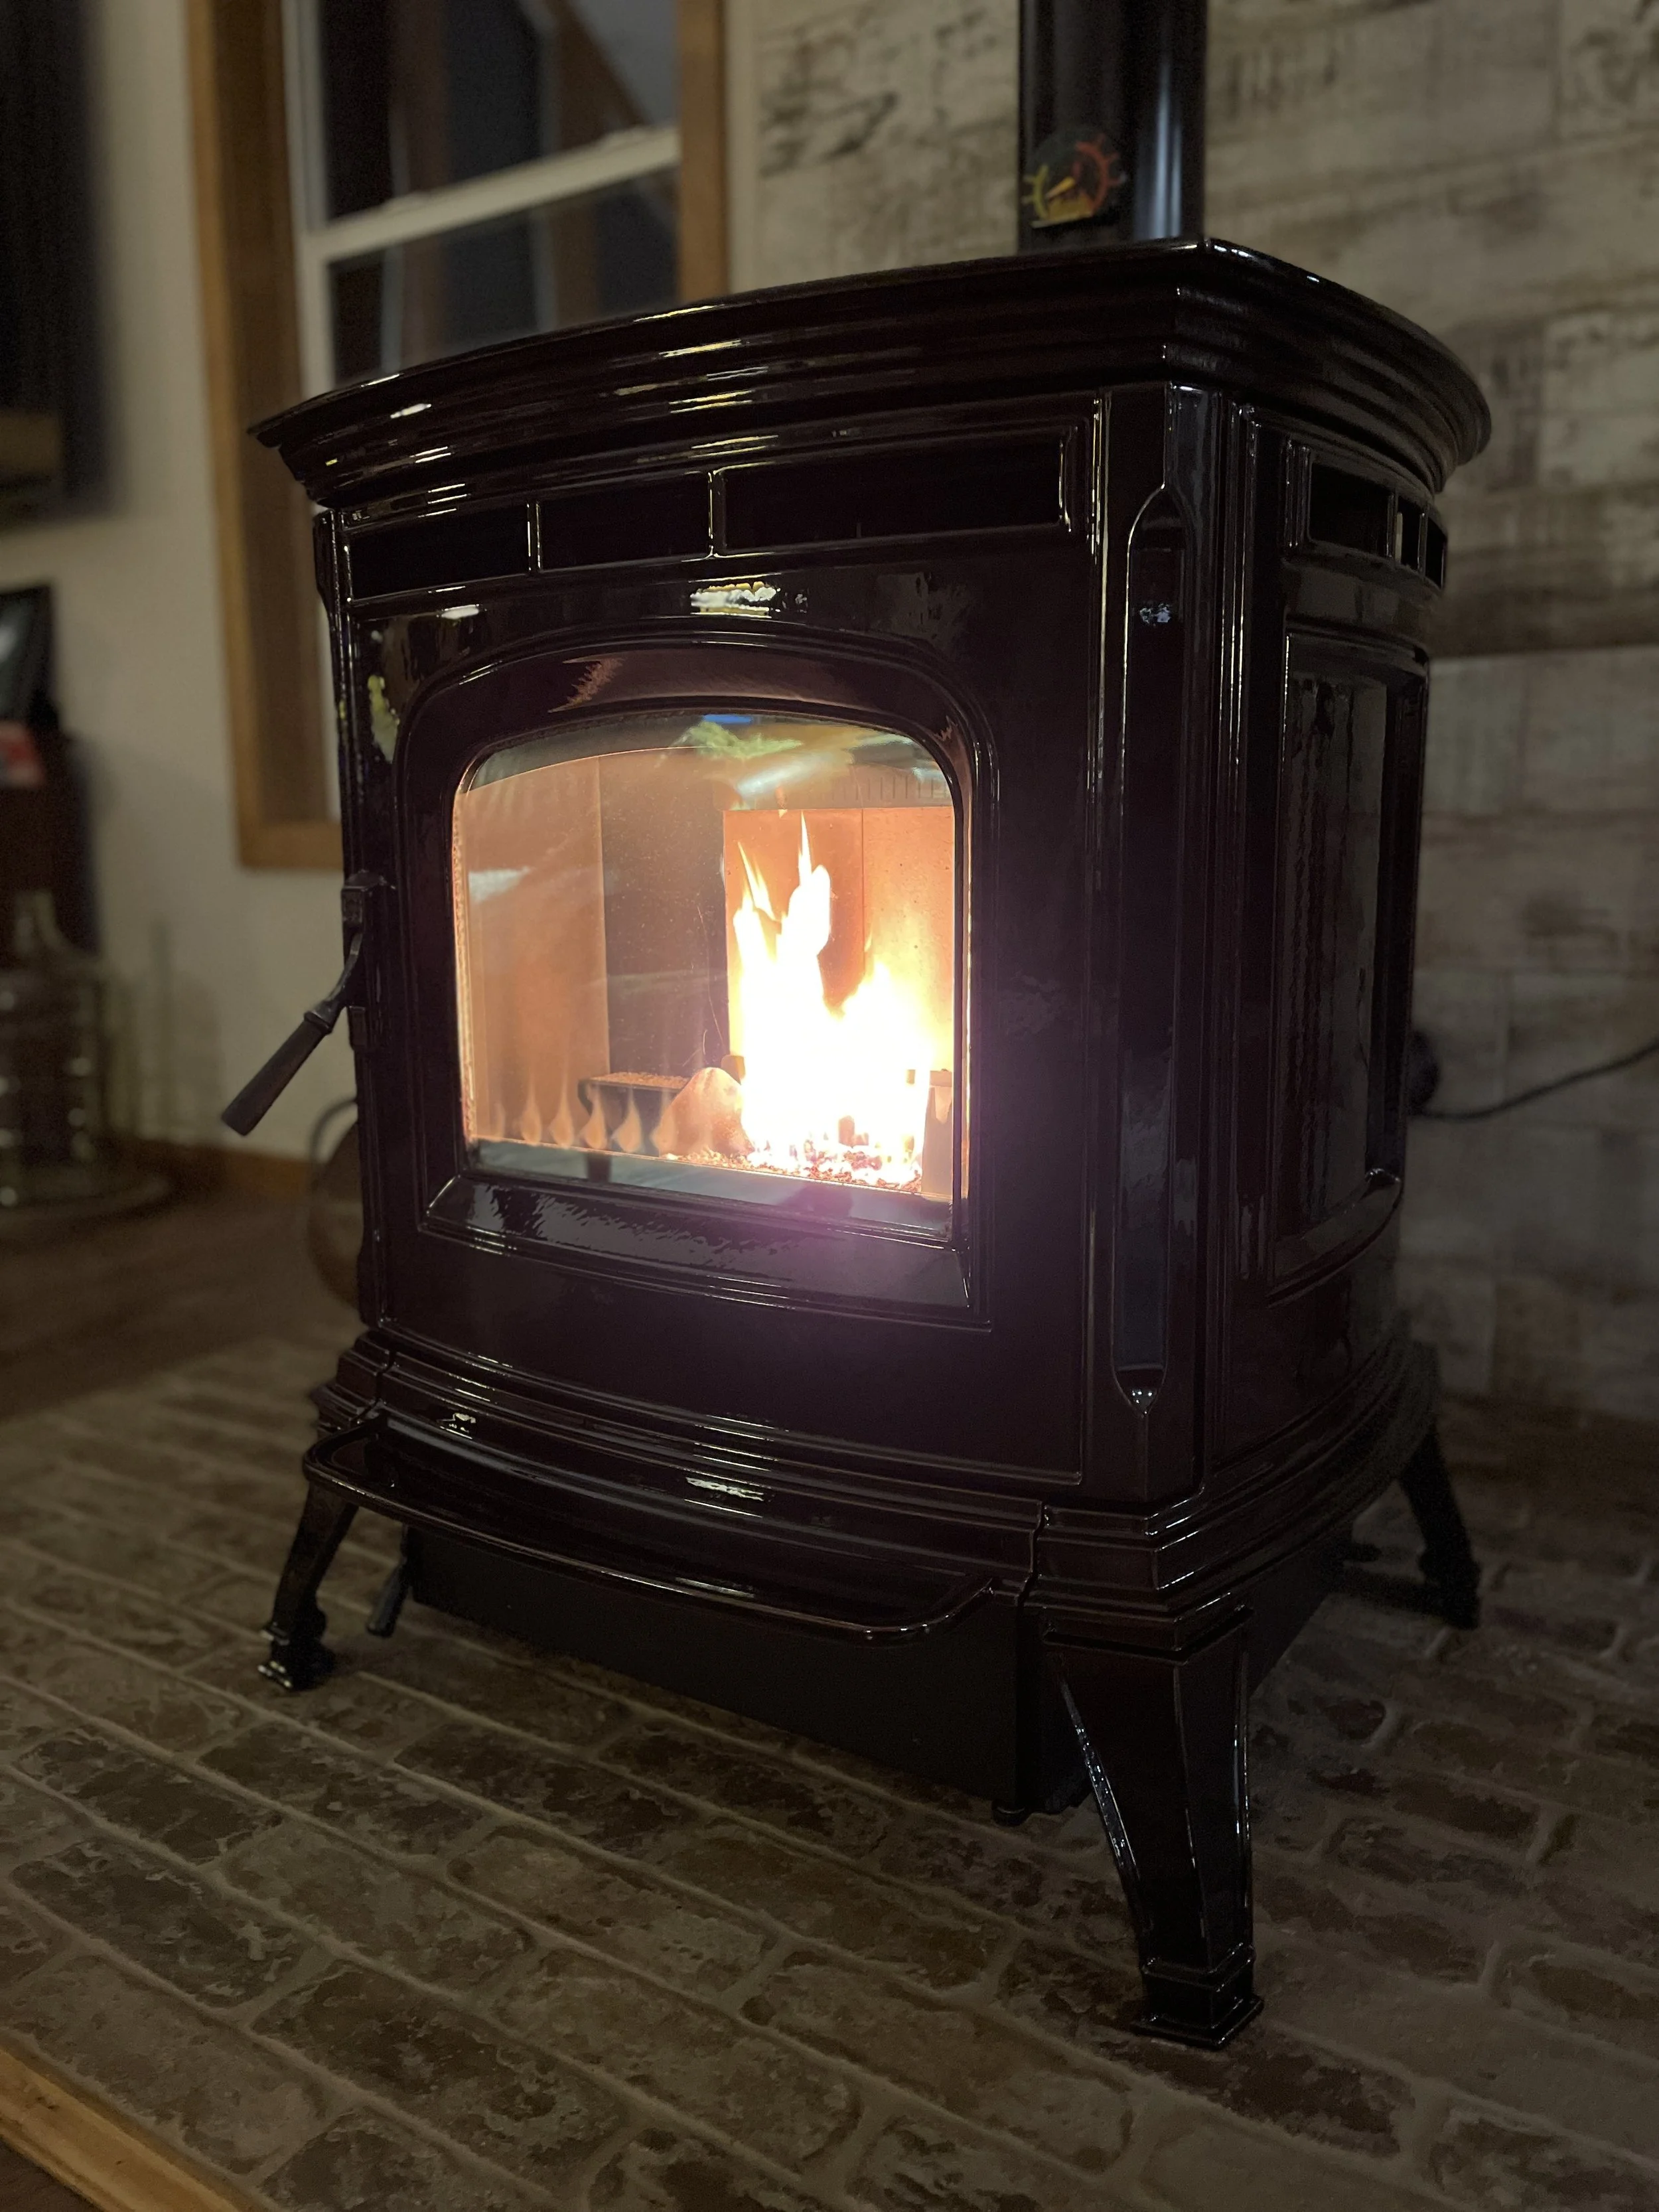
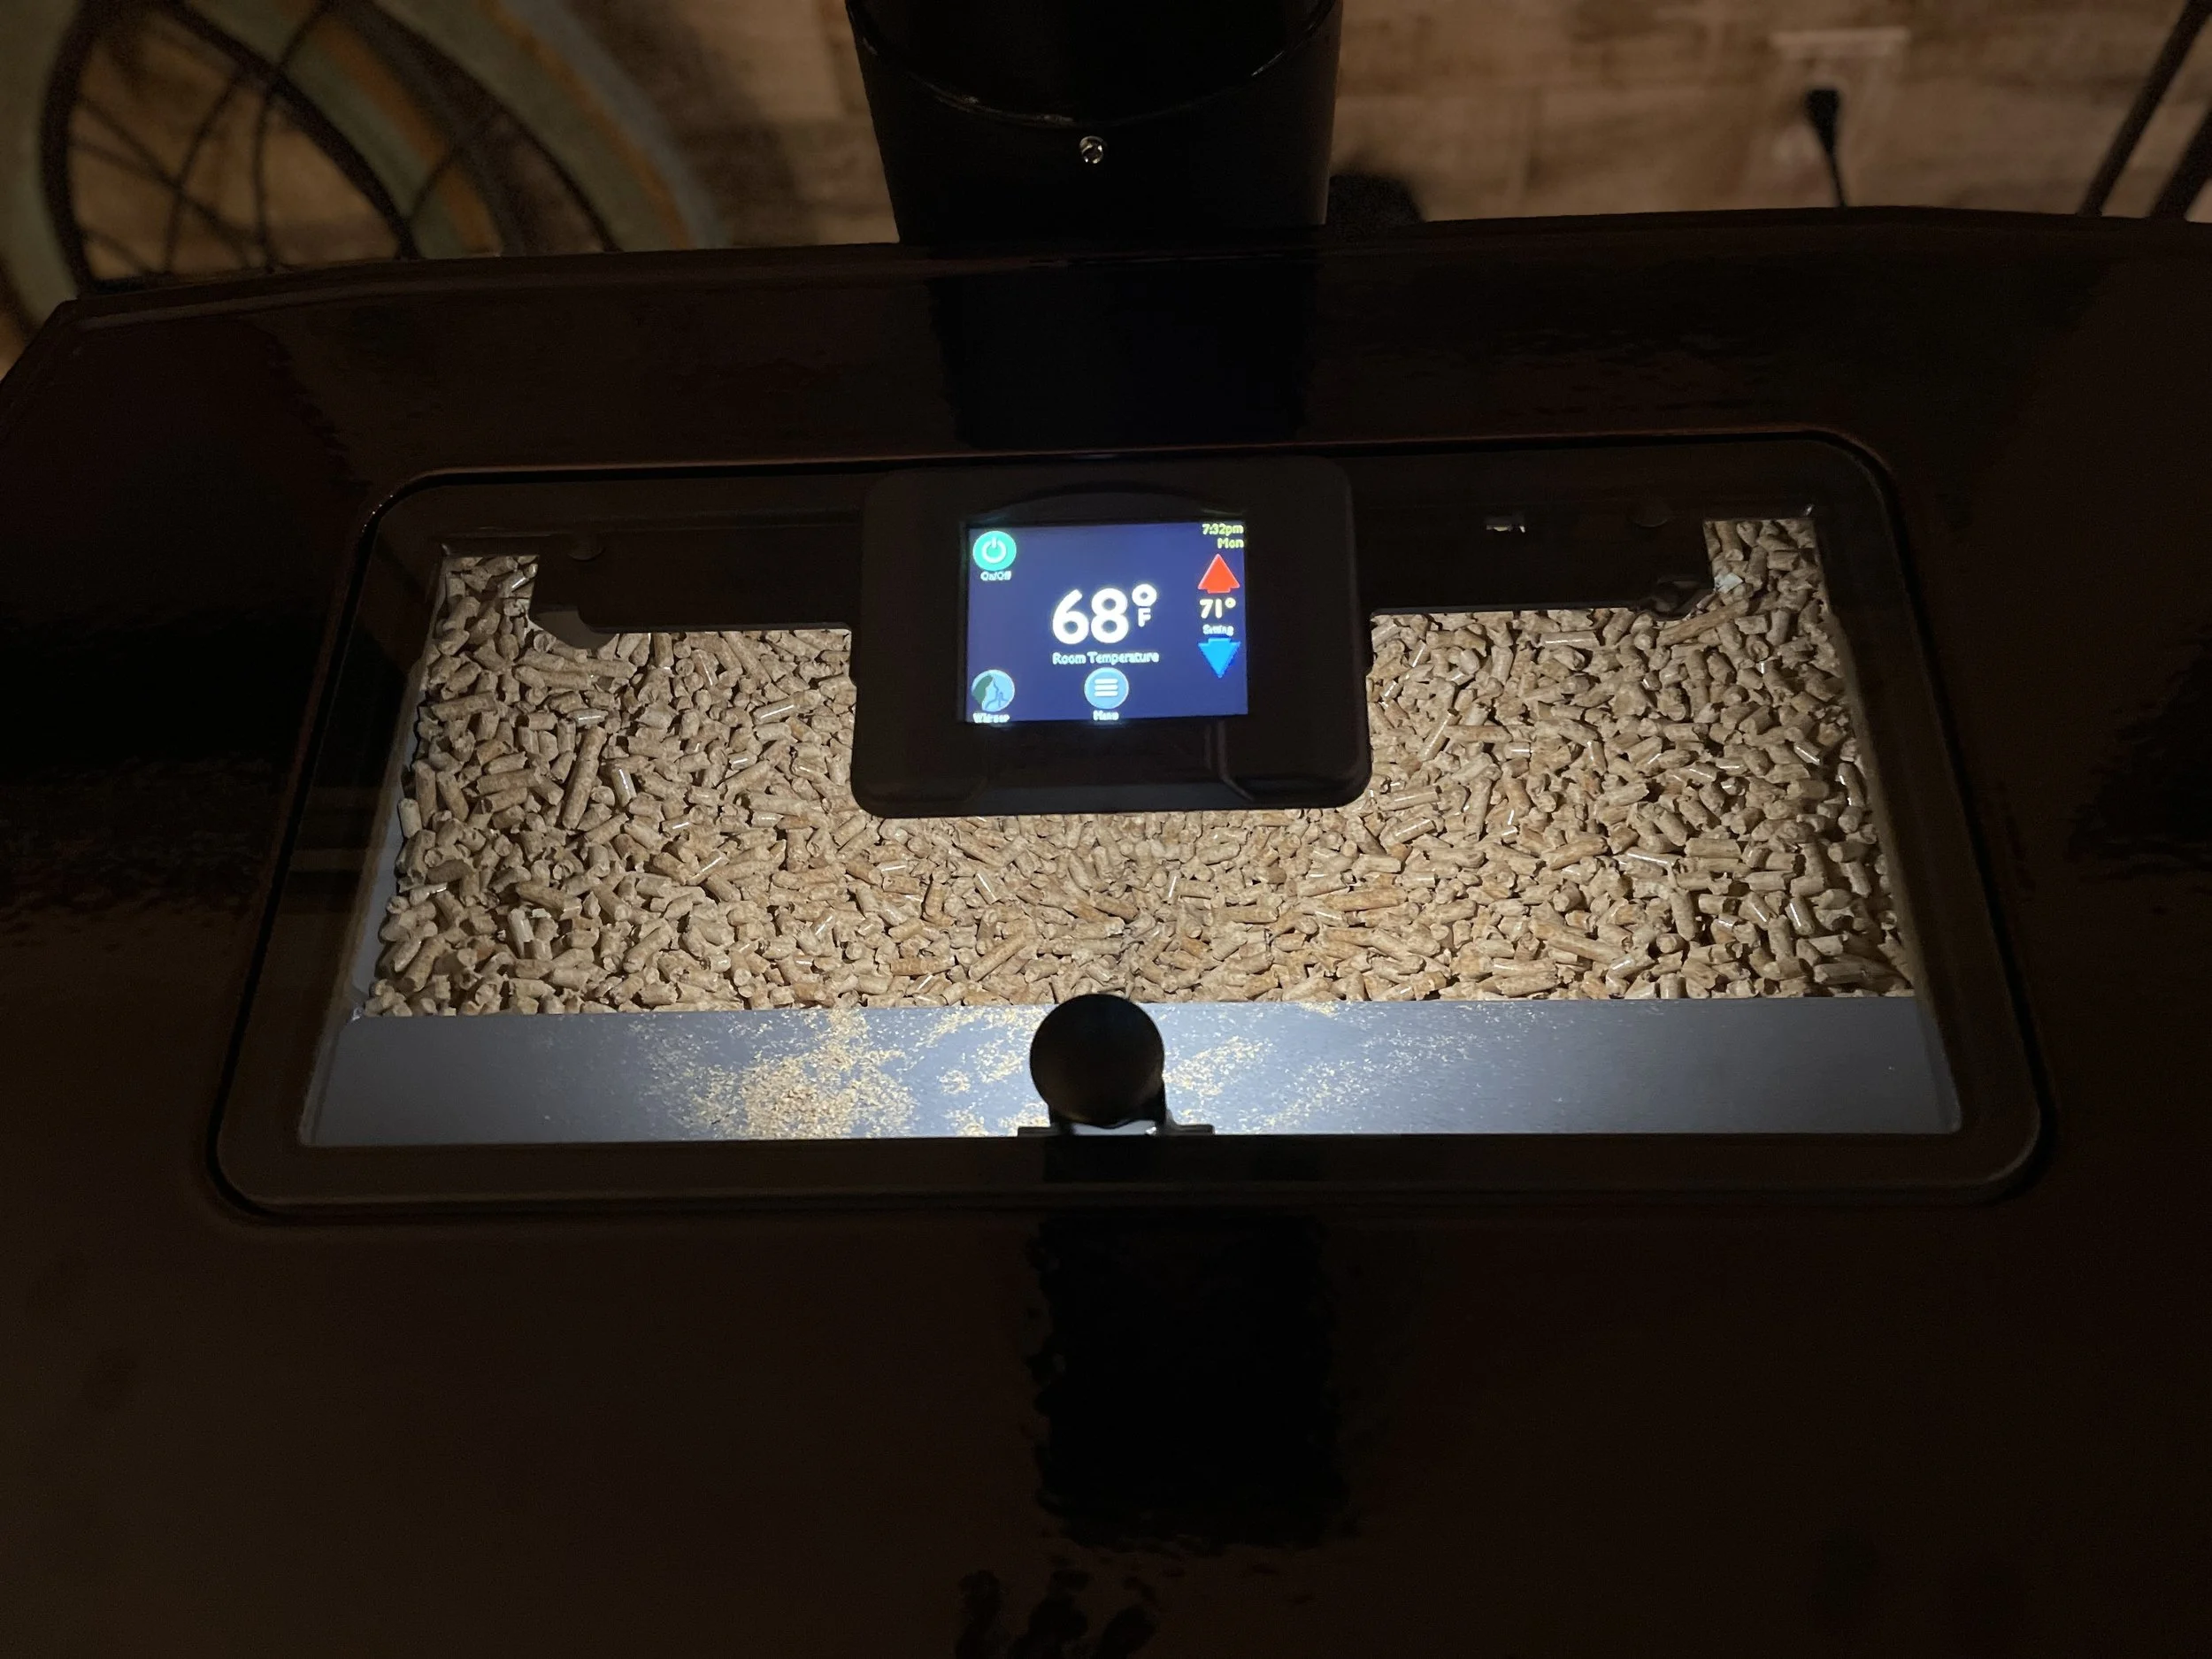
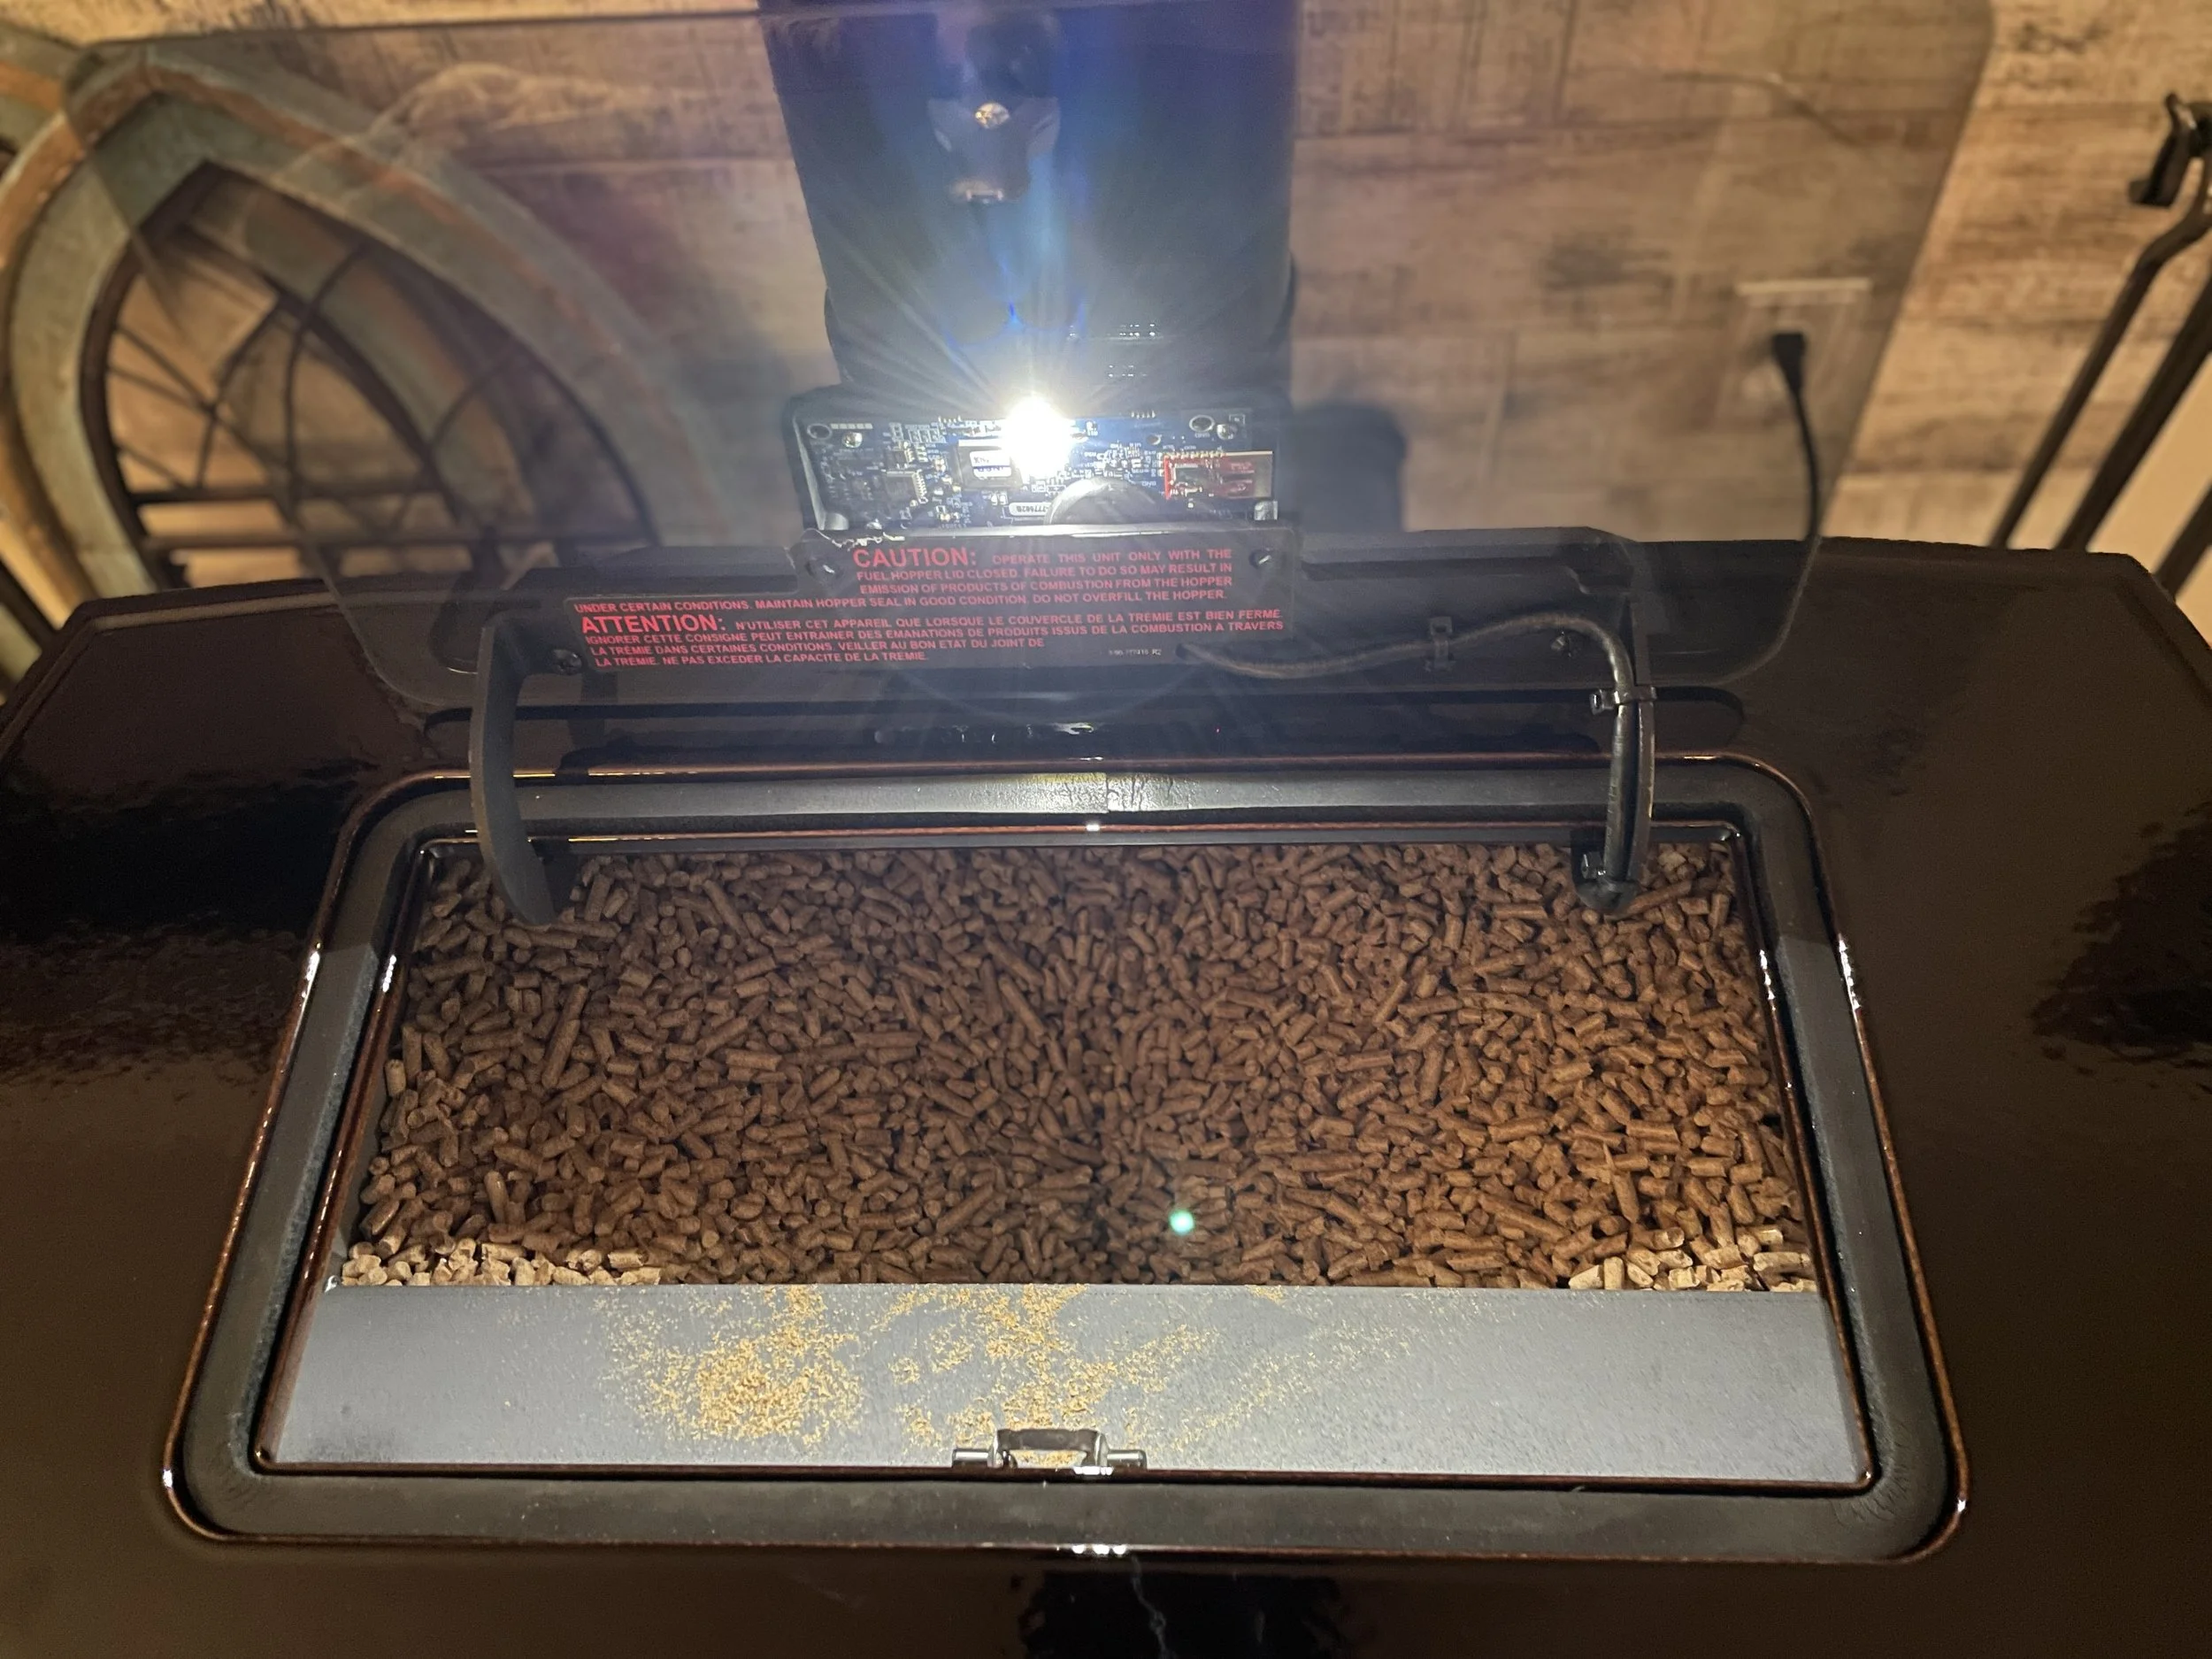
There is a glass access door on the top of the unit which lights up when you open it so you can fill with pellets. This model holds a bag and a half of pellets (40# bags), which is nice, because we won’t have any half-loaded pellet bags laying around. Using the stove is super easy with the LCD panel - just set the temperature (the thermostat is on the other side of the room). You can also control the blower. Super quiet, too!
Here are a few daylight shots which better show the subtle color difference.